For the convenience of Propuskator ACS users, access points can be grouped into spaces. You can make the necessary settings in the ACS web interface.
What are the spaces in the ACS Propuskator
Space is a collection of multiple access points. An example of a simple space is an office with two entrances and five interior doors controlled by ACS. All seven access points of this office can be combined into one space.
However, the same access points can be included in other separate spaces. These can be access points at the entrances to the office and at the entrance to a separate room – employees who are not allowed to enter other rooms will be able to use such a space.
Grouping access points into spaces makes it easier to set permissions for users. It is enough to specify that the subject has access to the entire space, and you do not need to provide separate access to each access point.
How to create a new space
- Log in to the ACS web interface: https://cloud.propuskator.com/.
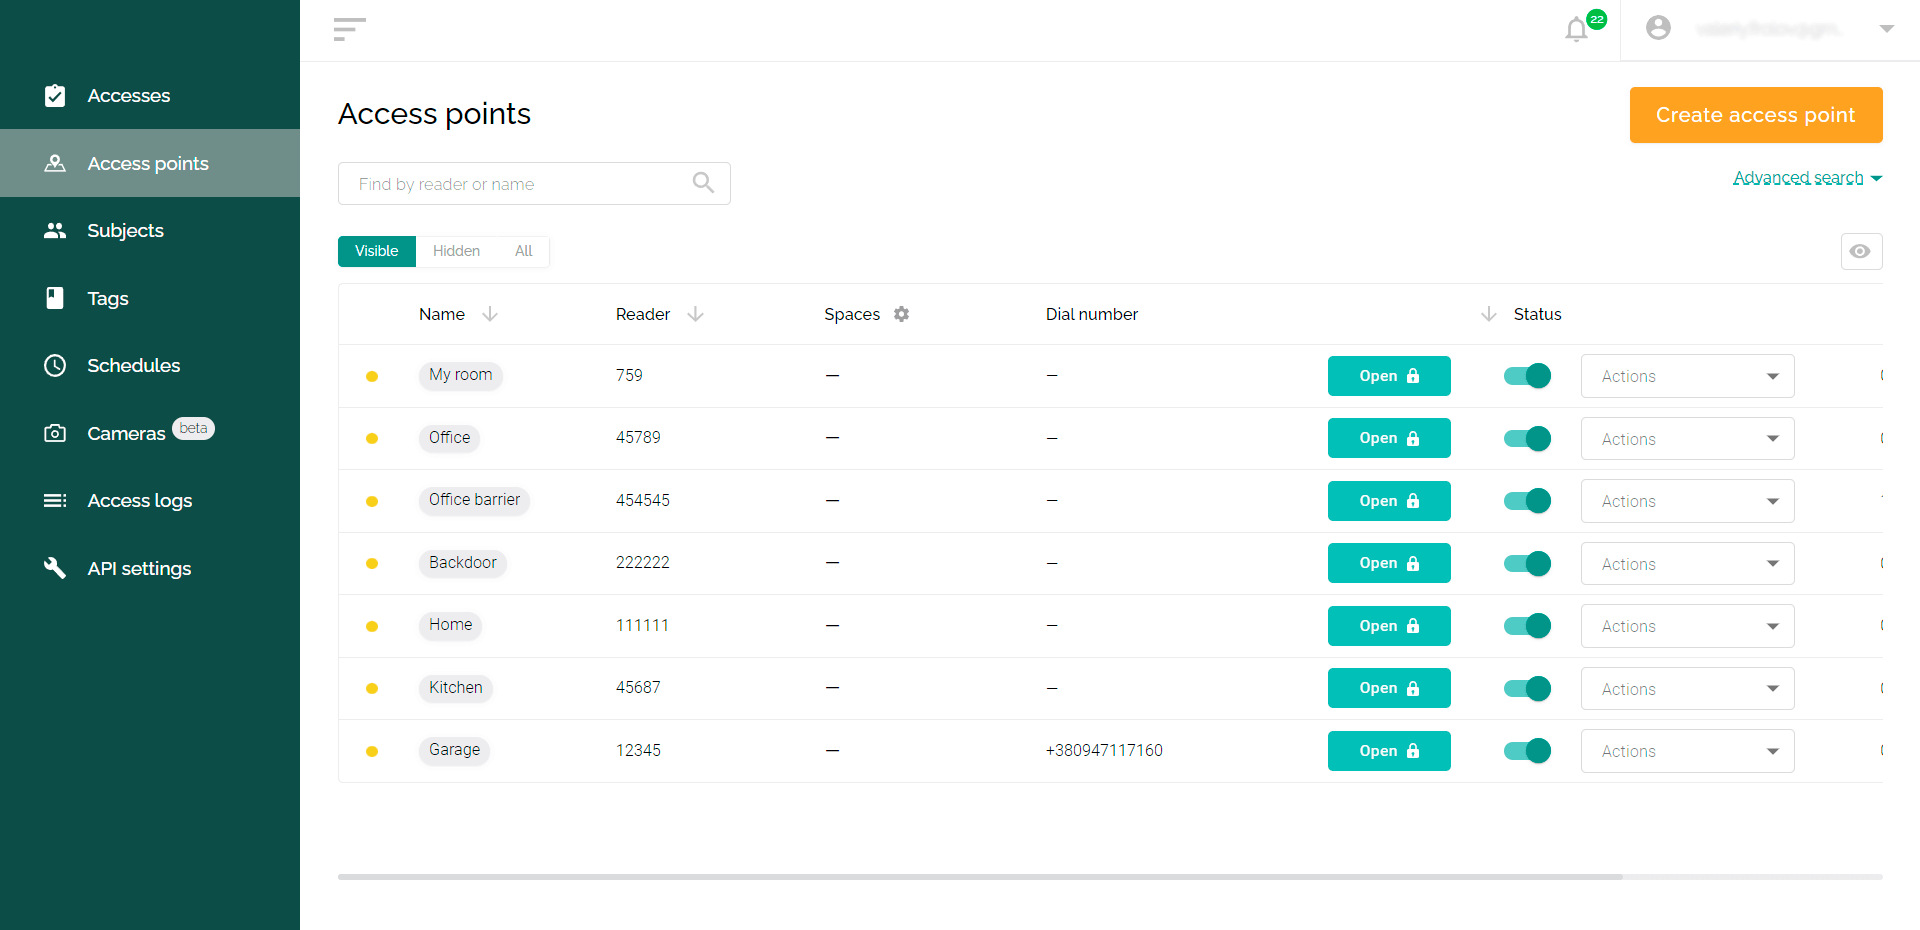
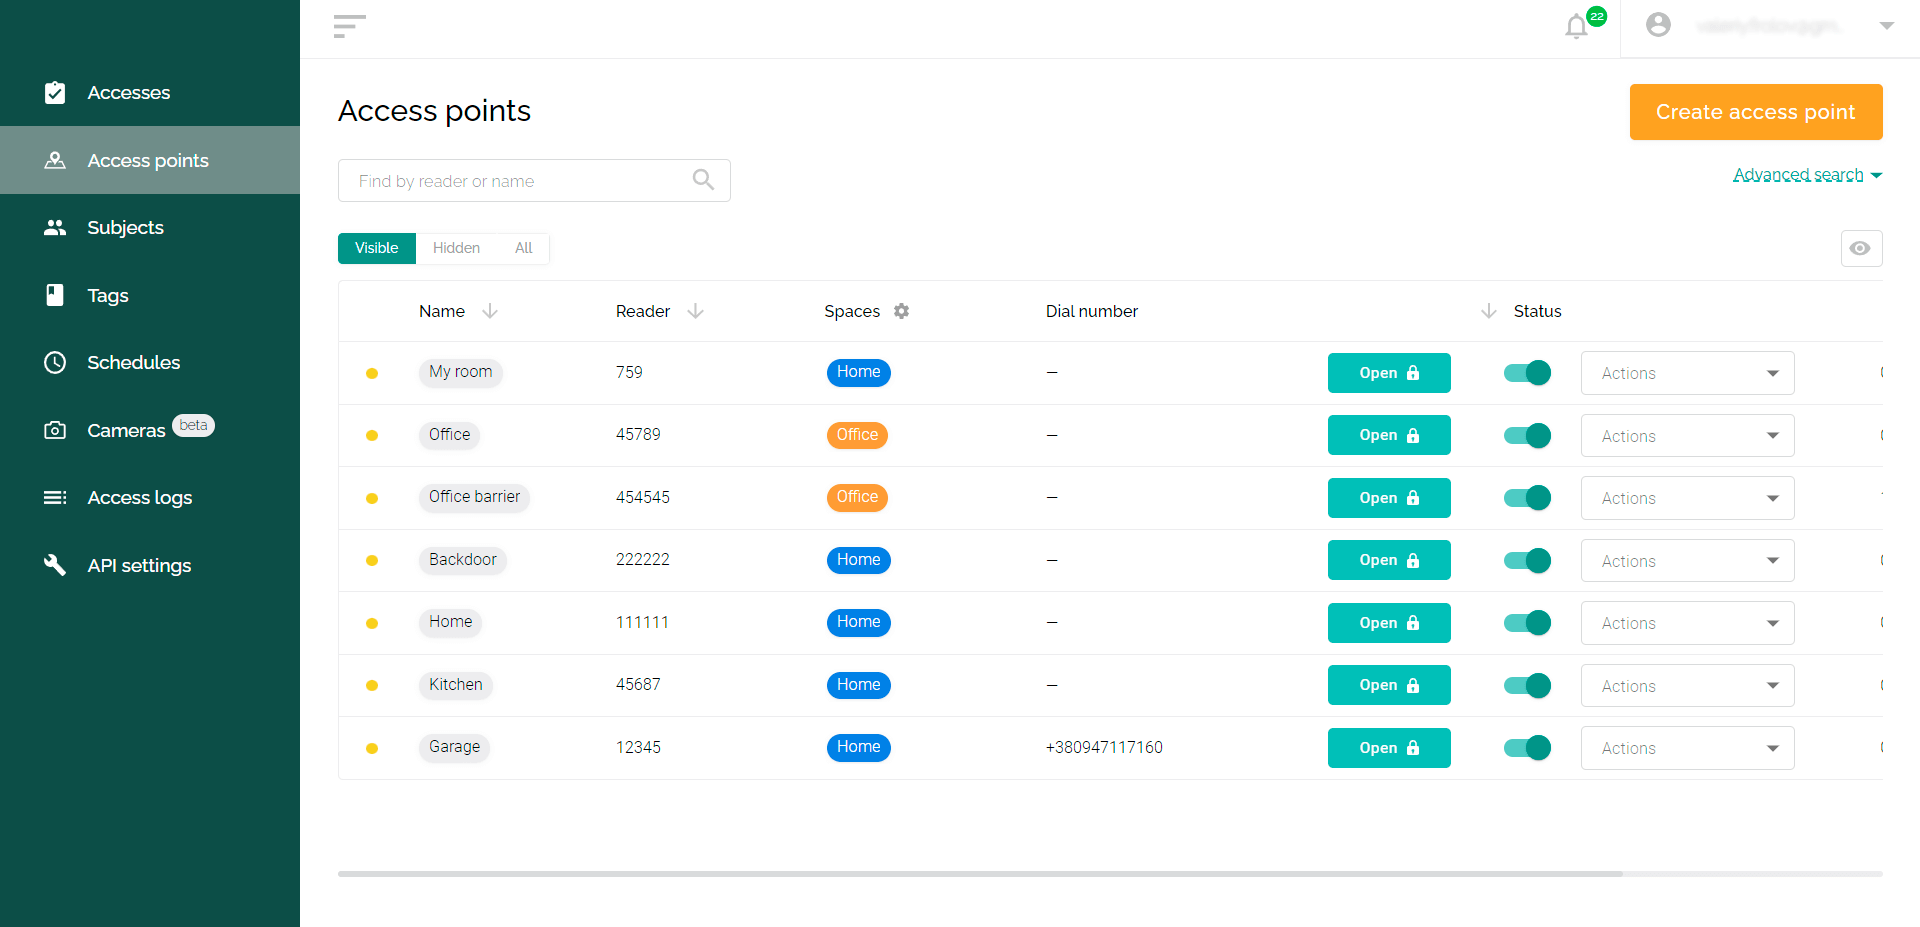
- Go to the “Access points” tab.
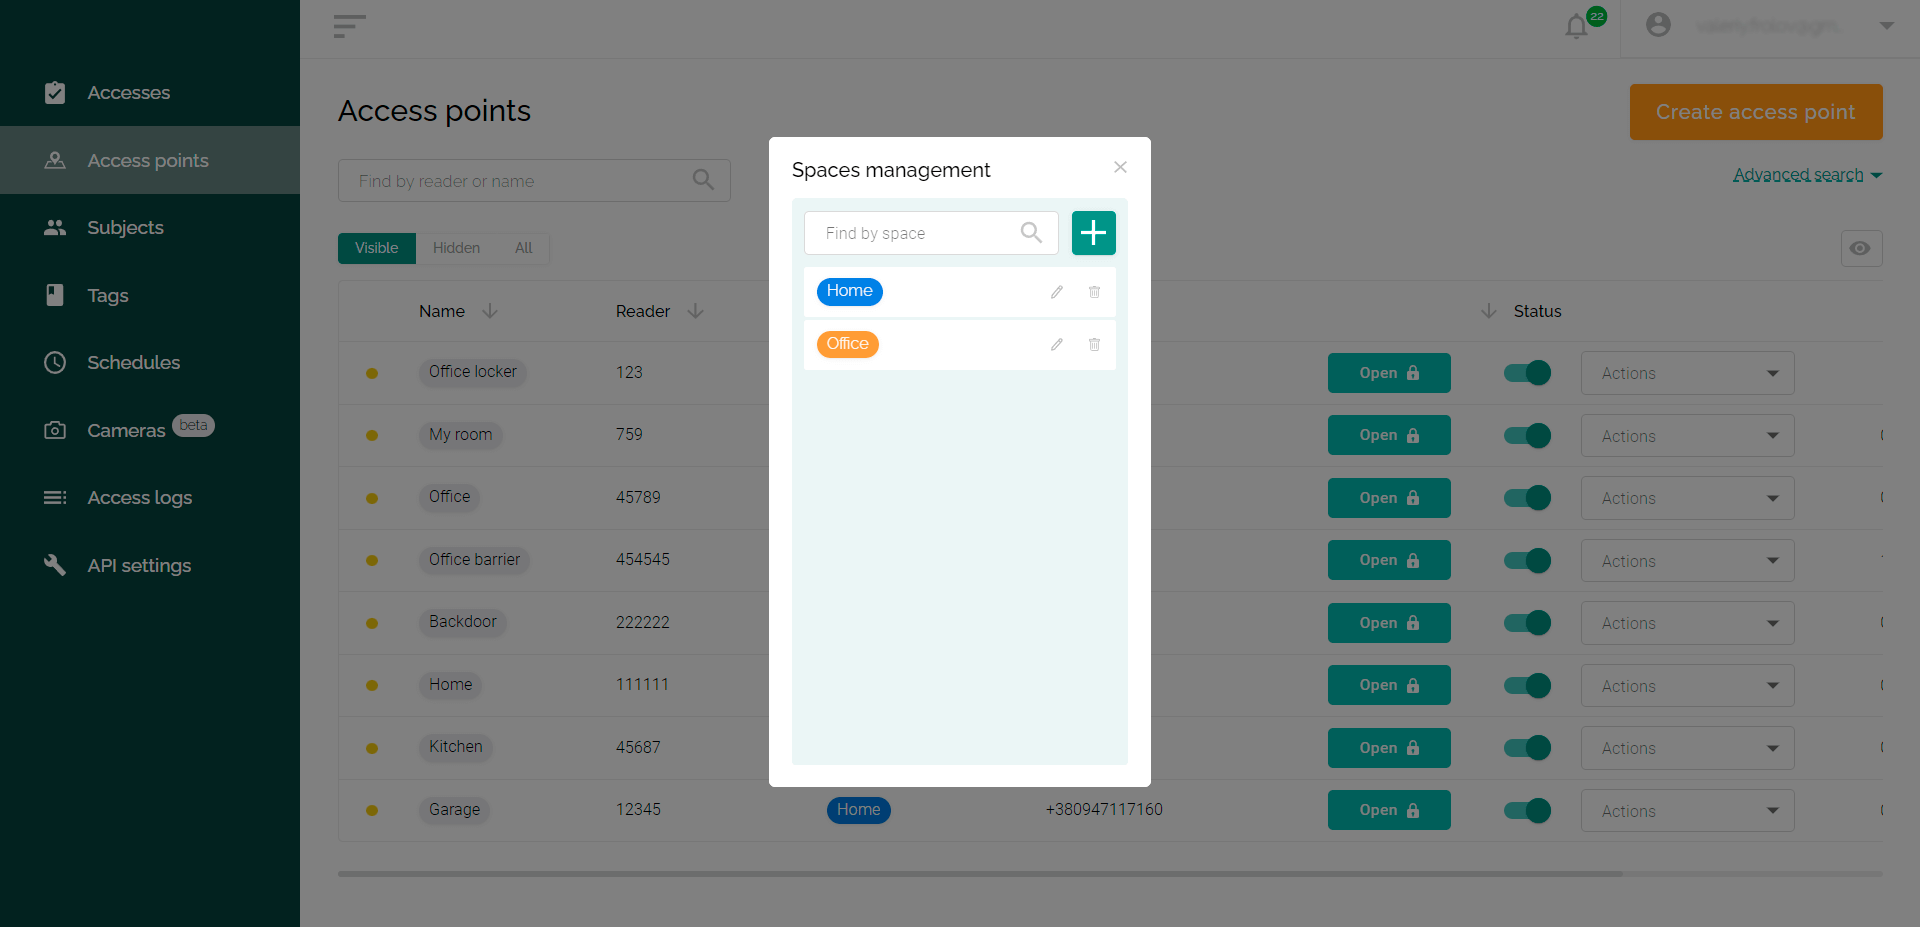
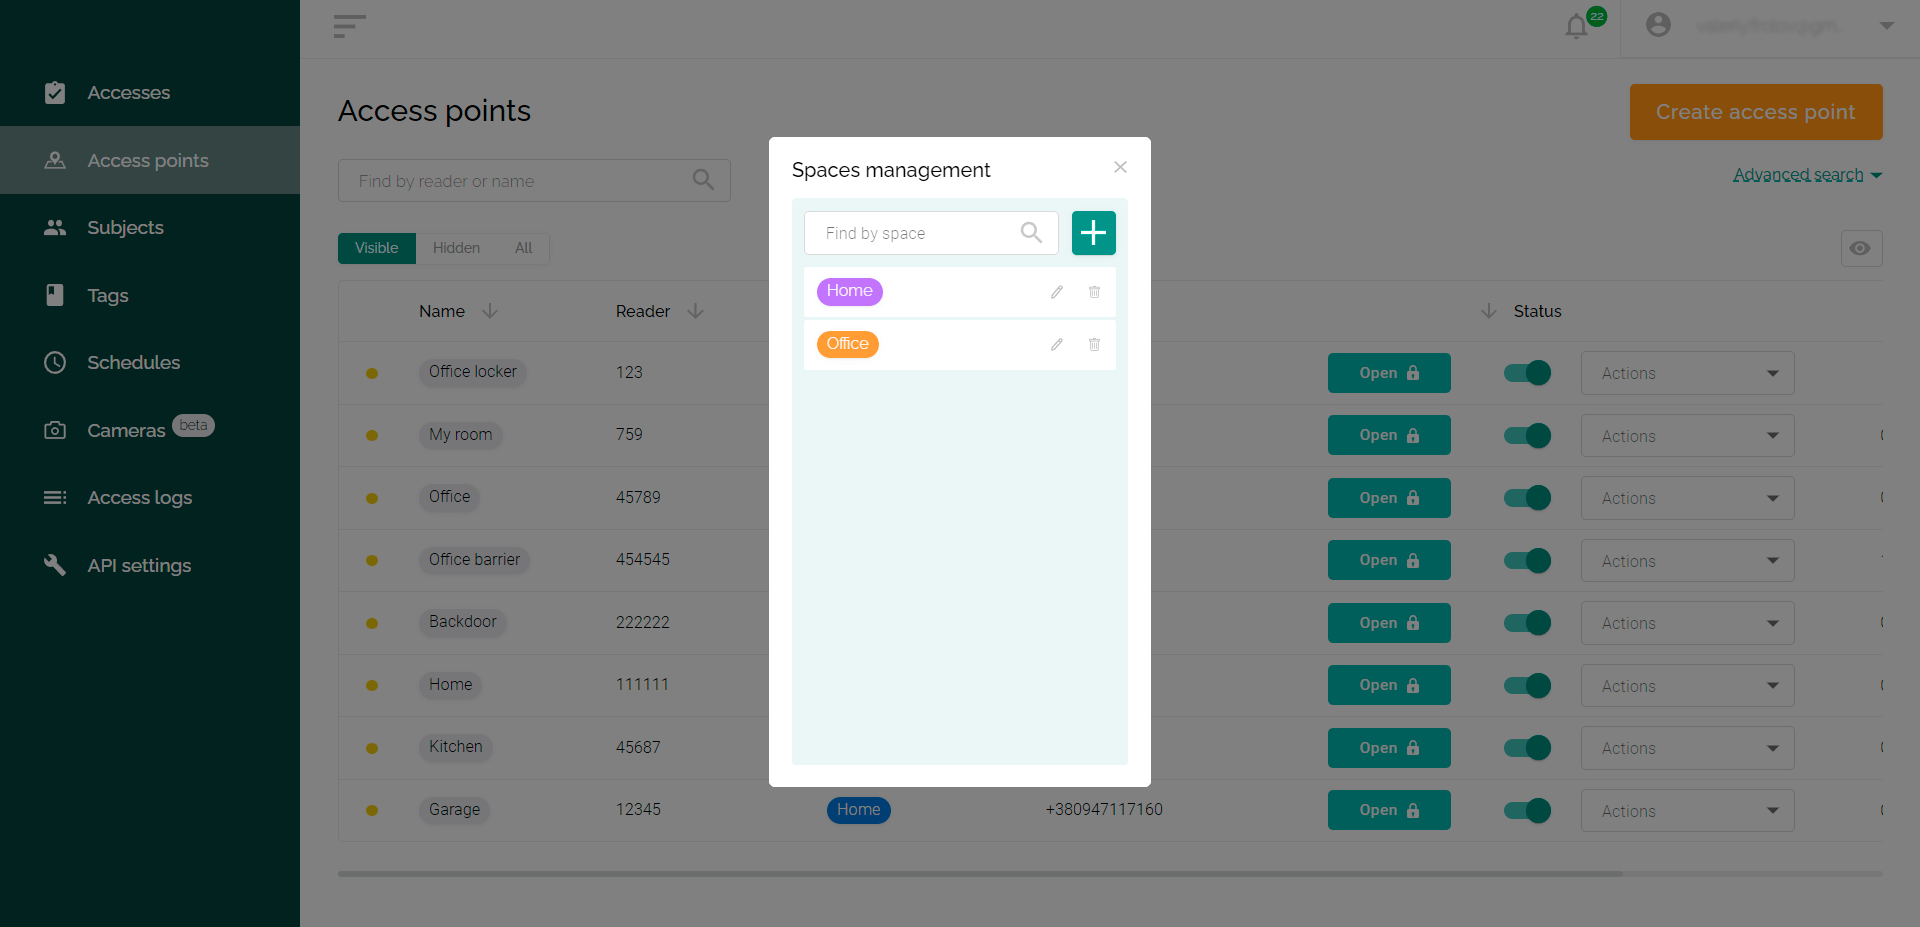
- Click the settings icon next to the Spaces column title. The “Spaces management” window will appear.
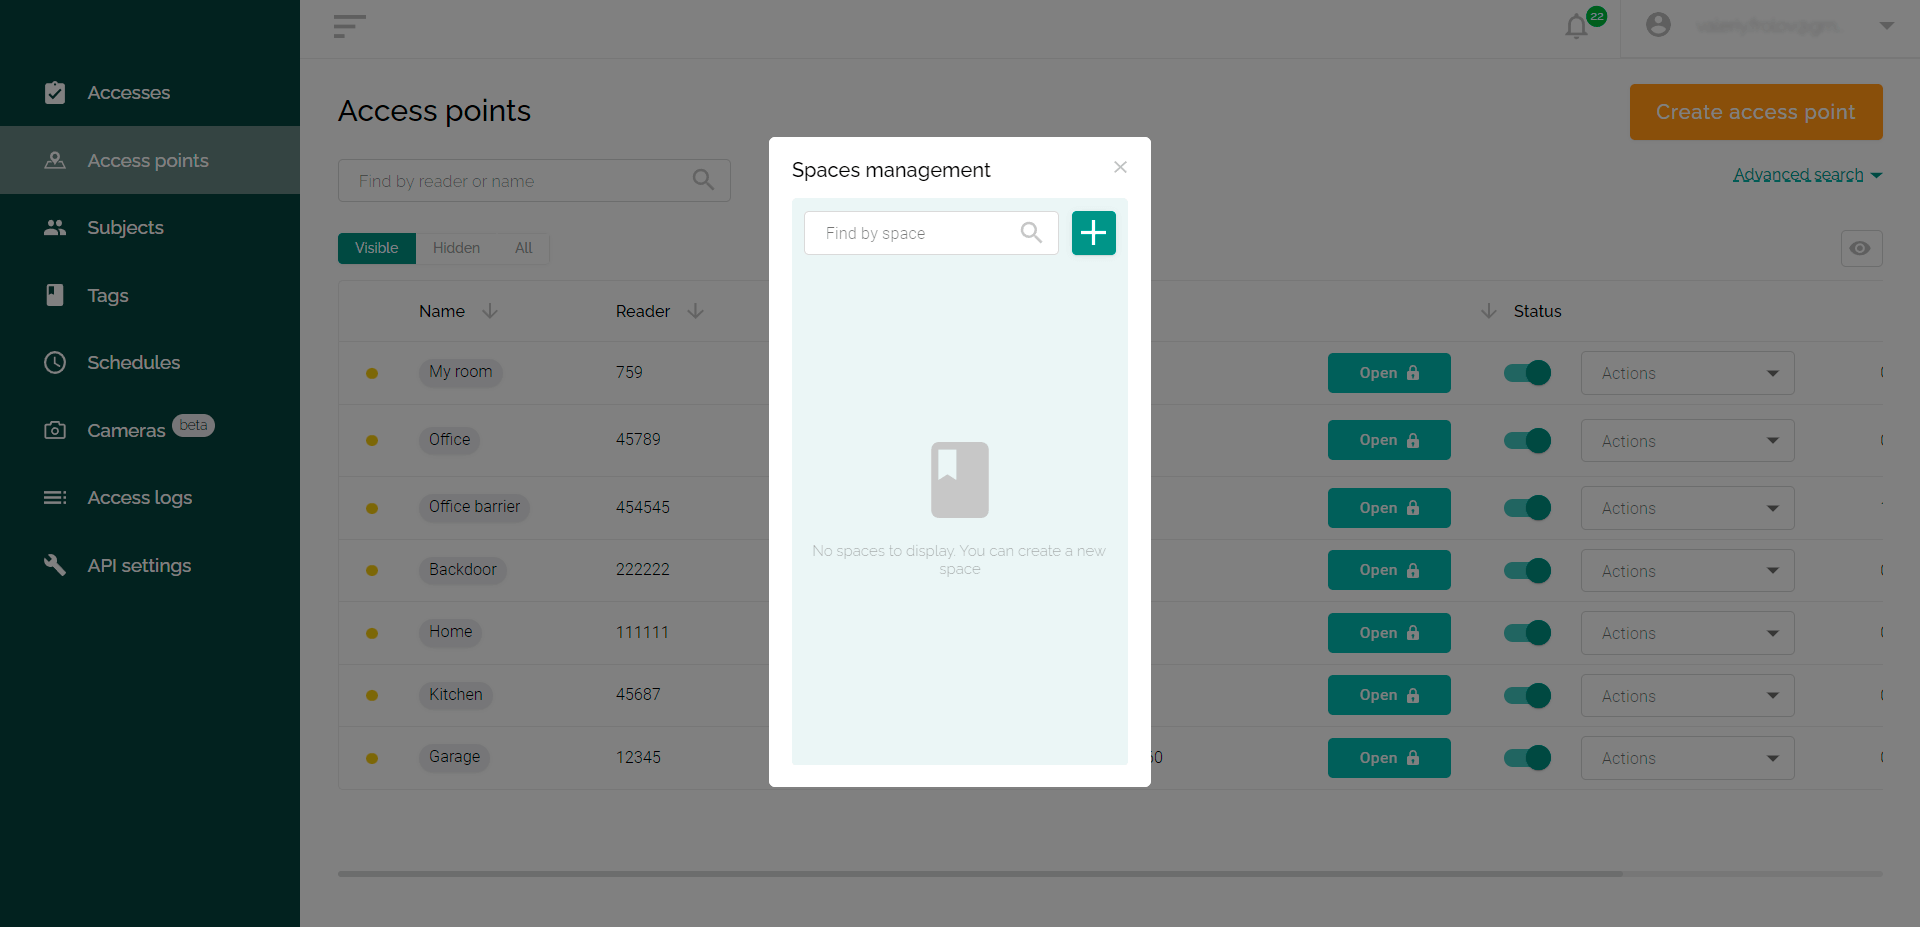
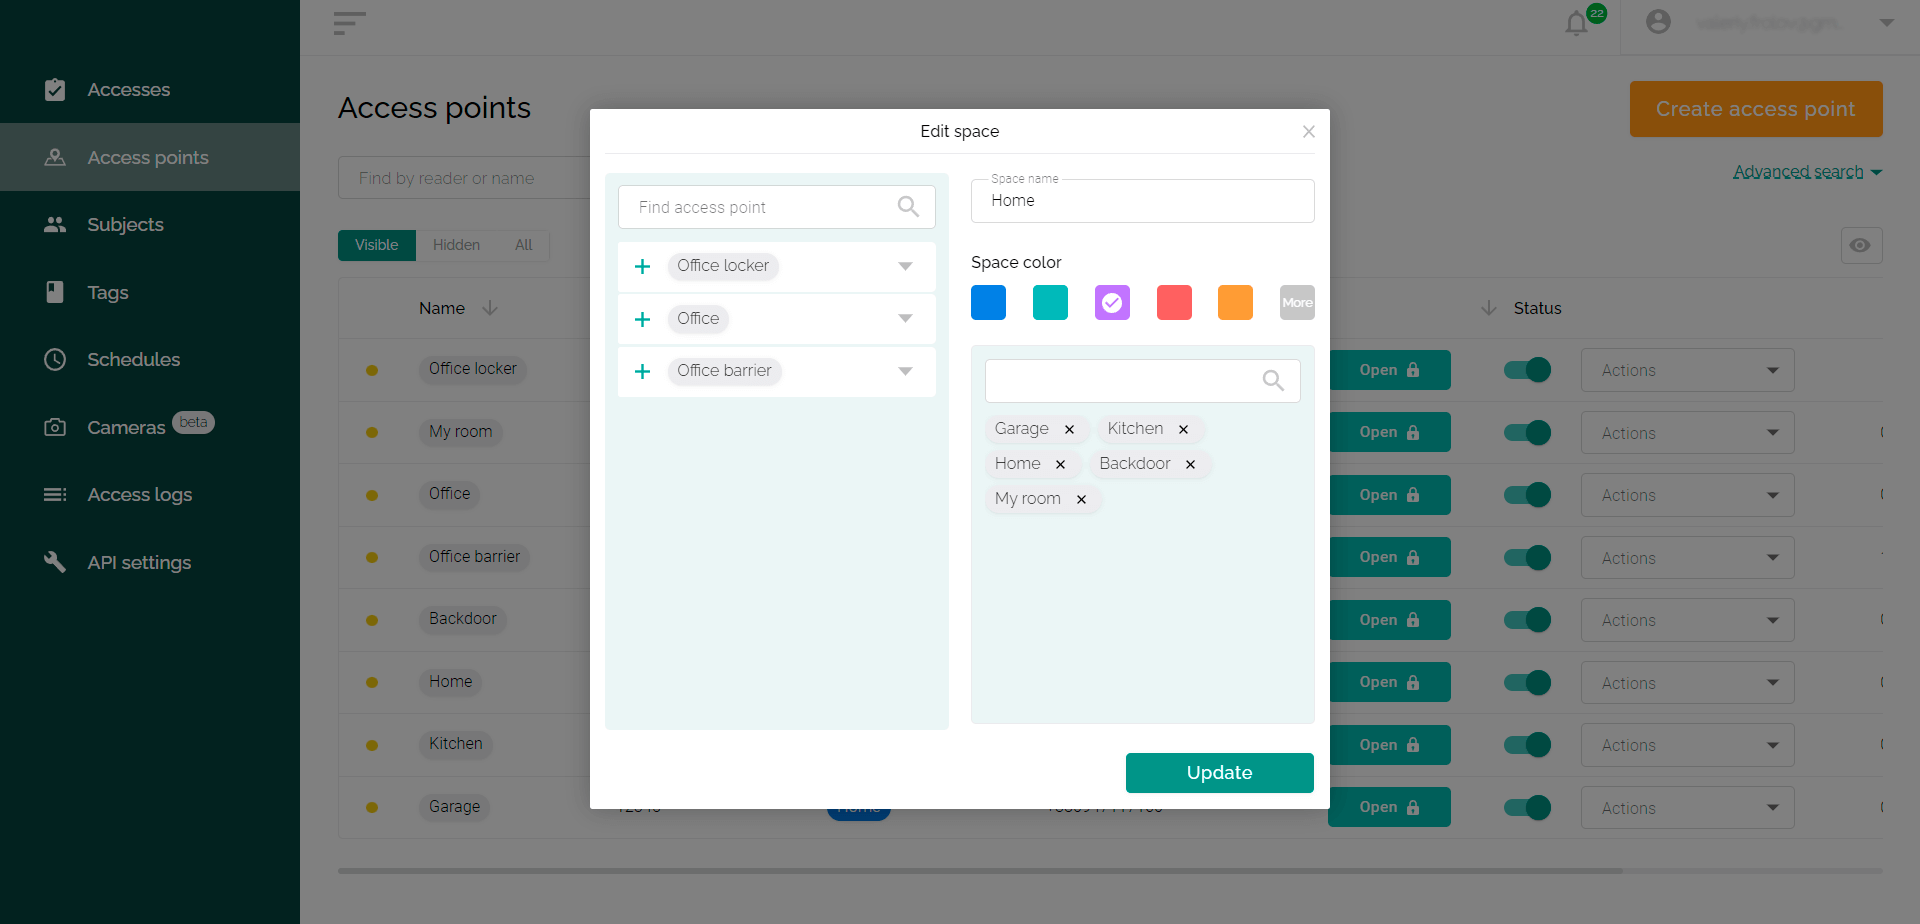
- To add a new space, click on the + icon. Make the necessary settings:
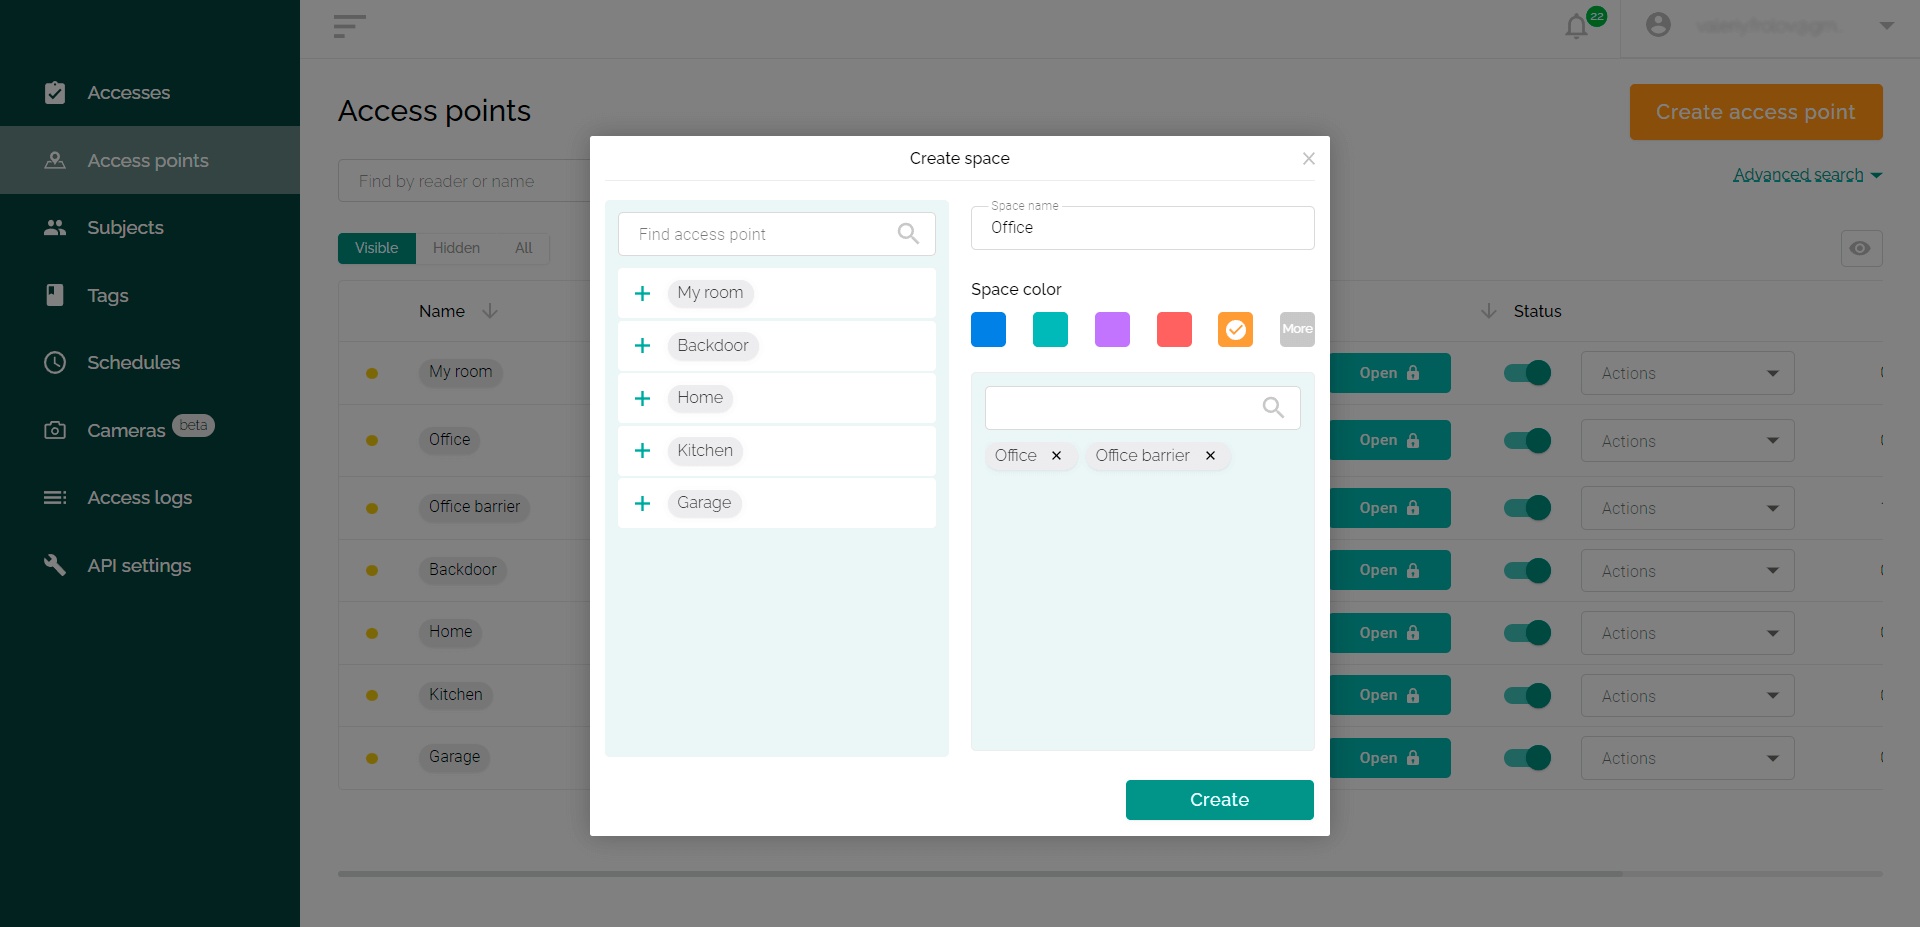
- Specify a meaningful name for the space, such as “Office”.
- Optionally, choose a color that will visually distinguish the space from others – this is convenient to separate similar spaces.
- Add access points that belong to this space by clicking on the “+” next to their name in the list or by dragging them into a special field.
- Click “Create”.
- The same access point can belong to multiple spaces. You can add additional spaces for more flexible permissions for users.
- Information about which spaces include specific access points is displayed on the “Access Points” tab.
Adding access points to space
The first of the methods described above – you can do this when creating a new space.
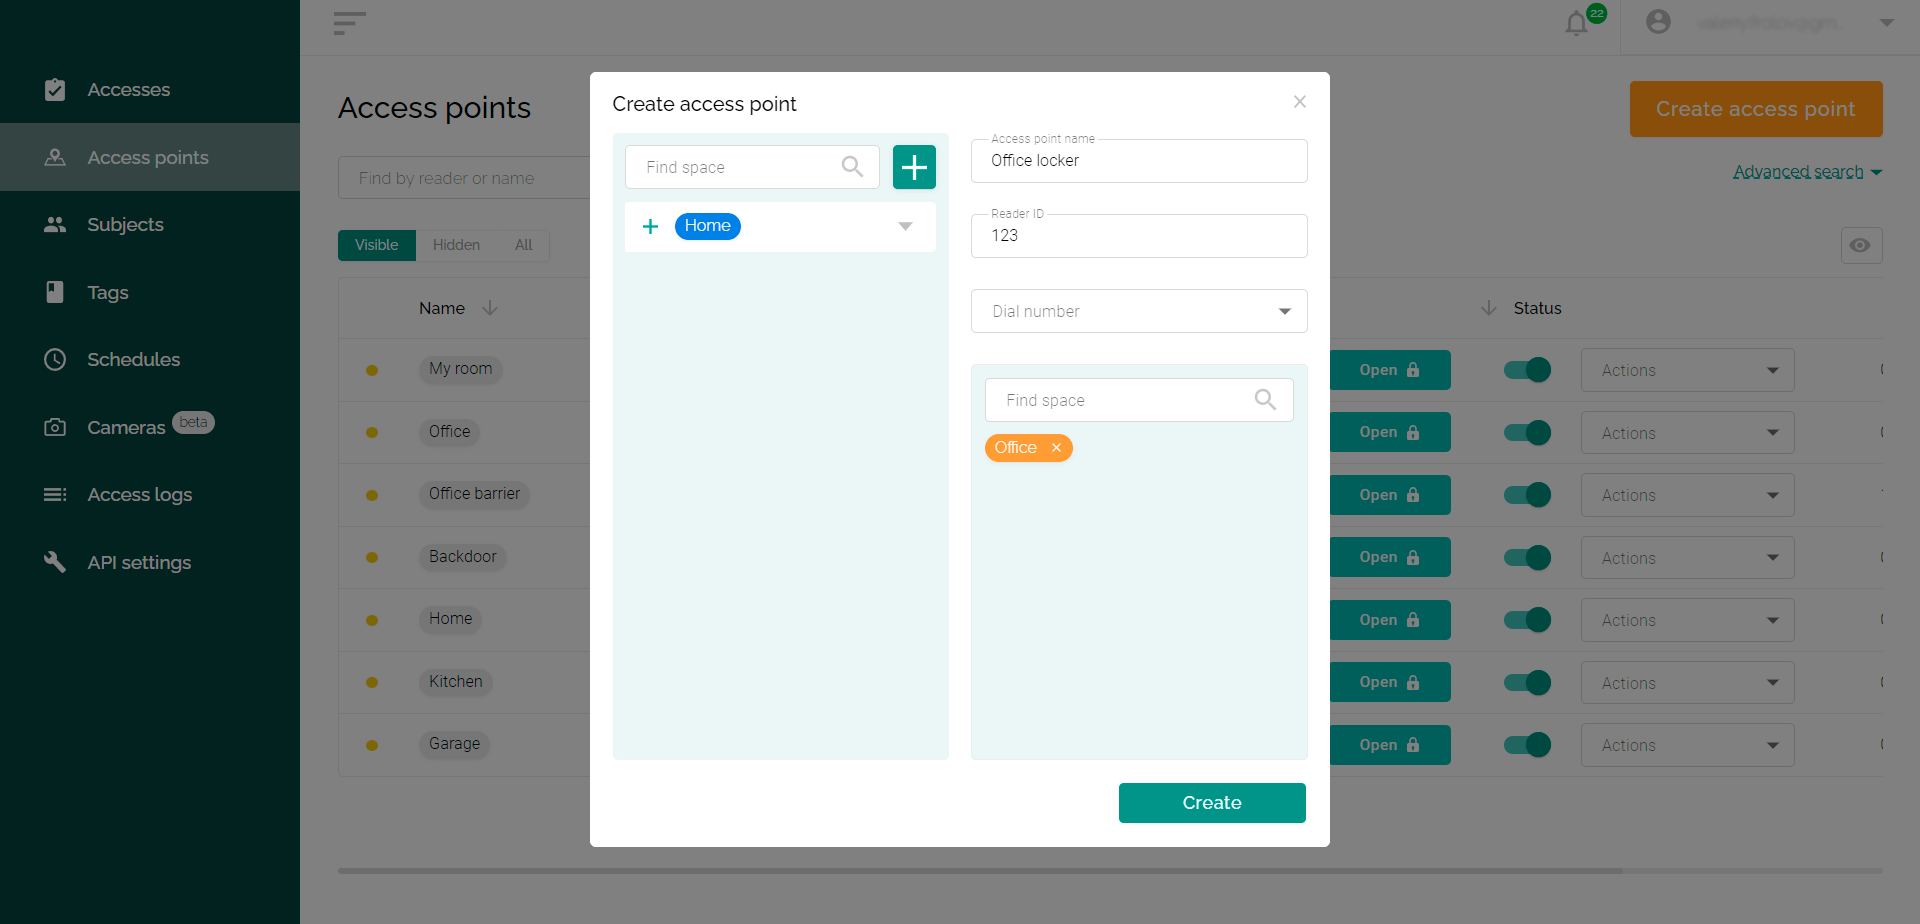
The second way is when adding a new access point, include it in an existing space. To do this, in the window for adding an access point, you need to specify in which spaces you want to include it.
How to grant access to space for users
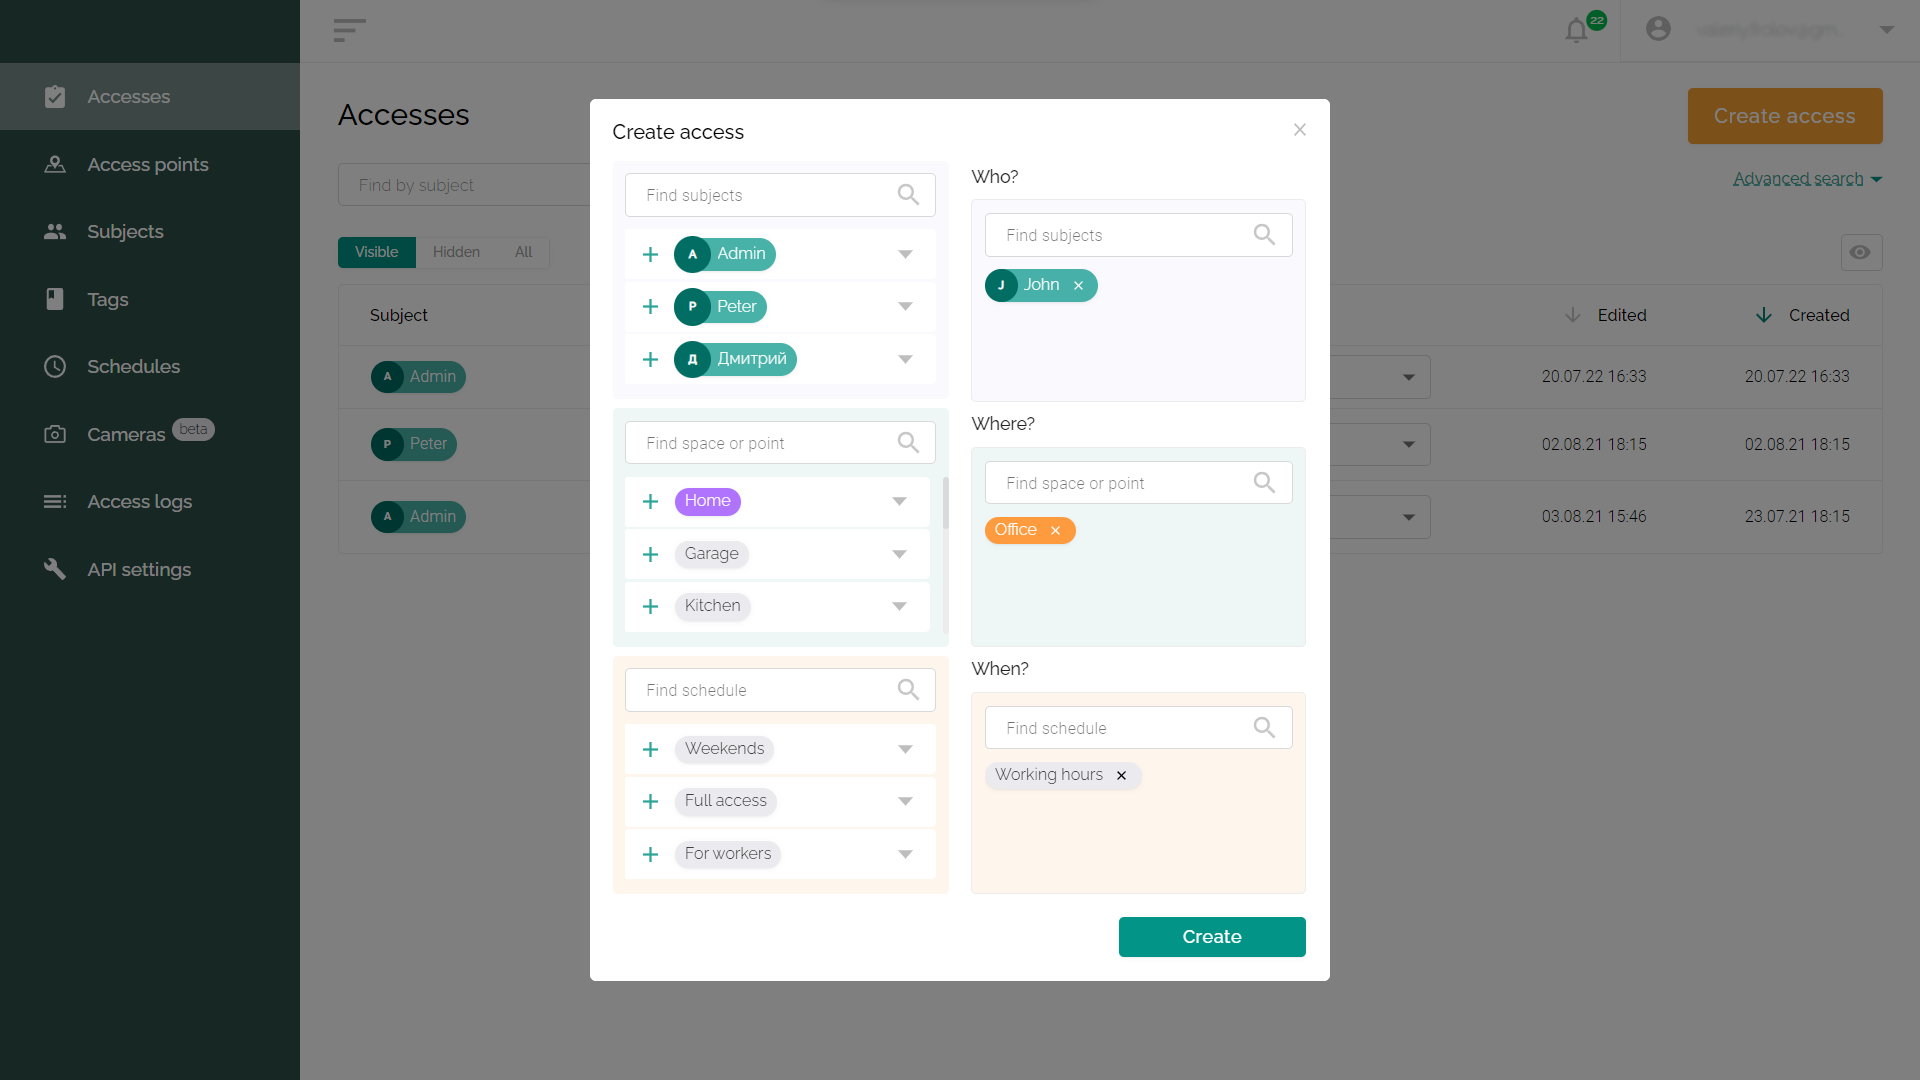
- Go to the “Accesses” tab.
- Click the “Create access” button.
- Add one subject or multiple subjects that will get the same rights.
- Select the spaces that the specified subject will have access to.
- Select one or more access schedules for the subject.
- Click the “Create” button.
Editing and deleting a space
To edit an existing space:
- Go to the ”Access points” tab of the ACS web interface.
- Click the settings icon next to the Spaces column title. In the window that appears, click on the edit icon next to the name of the desired space.
- Make any necessary changes to the space properties and click Update.
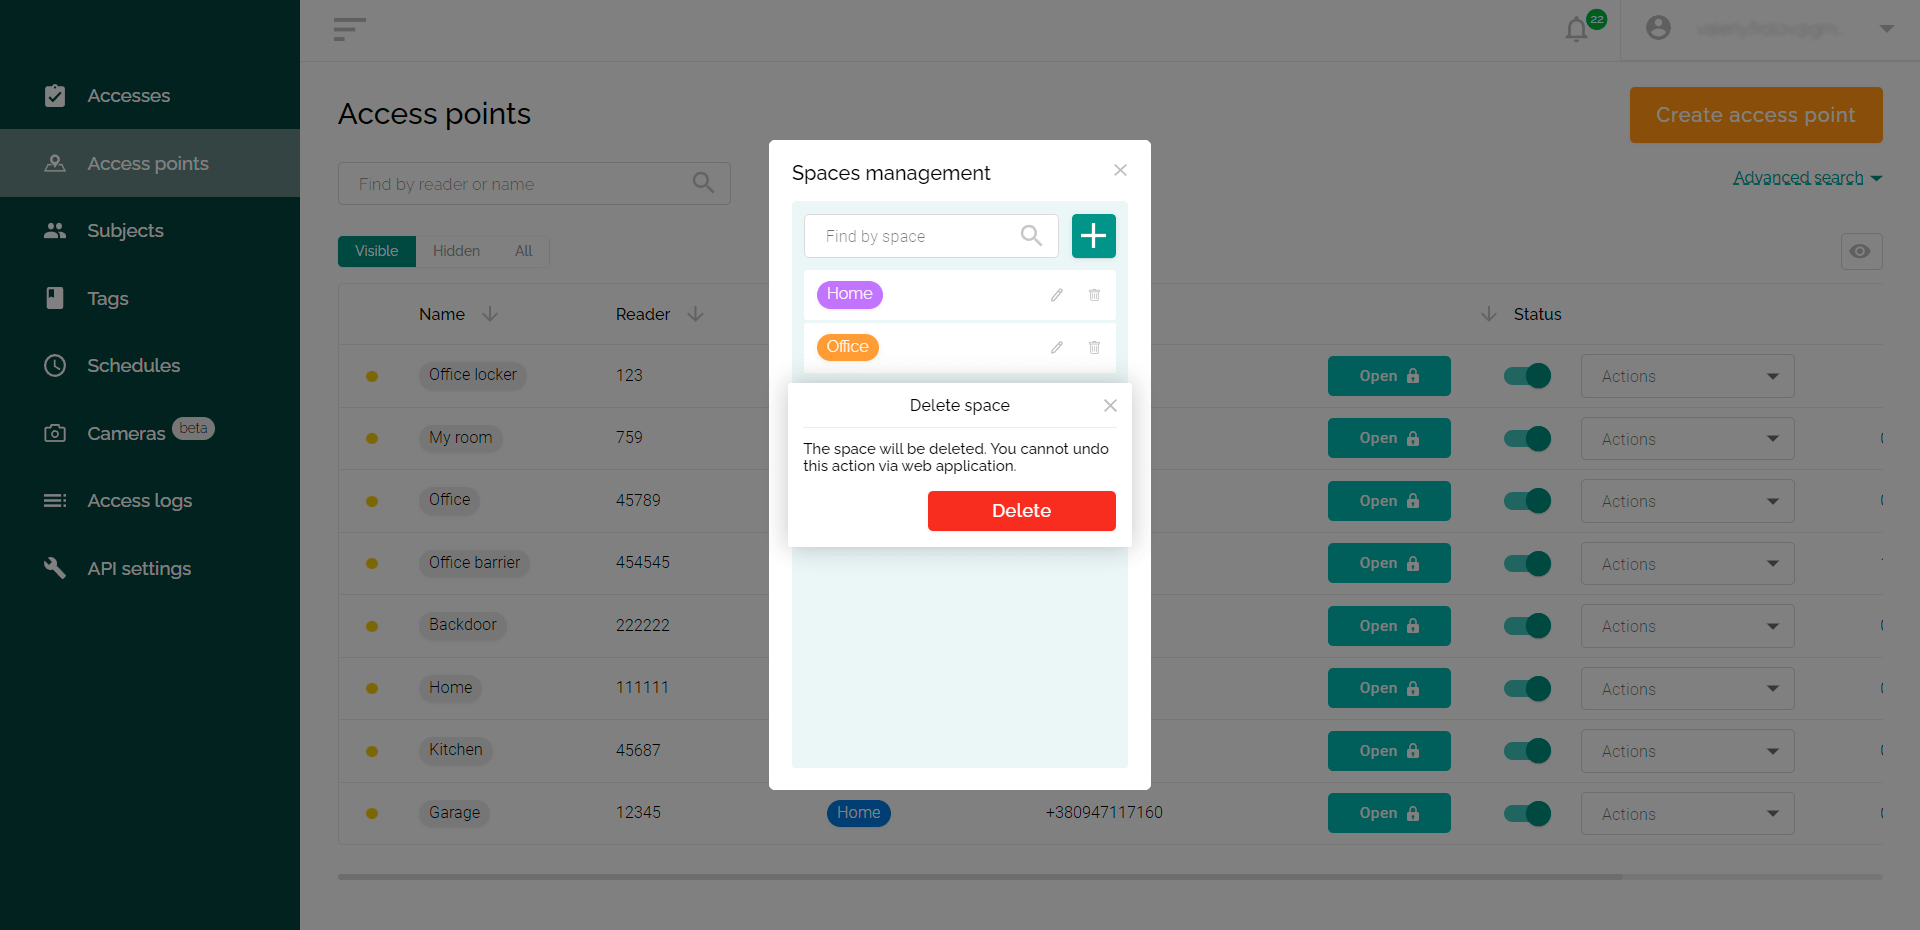
To remove space:
- Go to the “Access points” tab of the ACS web interface.
- Click the settings icon next to the Spaces column title. In the window that appears, click on the trash can icon next to the name of the desired space.
- Confirm your desire to delete the space.