To manage access using a cloud-based ACS, you must register your account on the Propuskator website and configure the web interface. In this manual, we will introduce you to all the features of your account and help you set up the ACS web interface.
Registering a workspace in the cloud ACS Propuskator
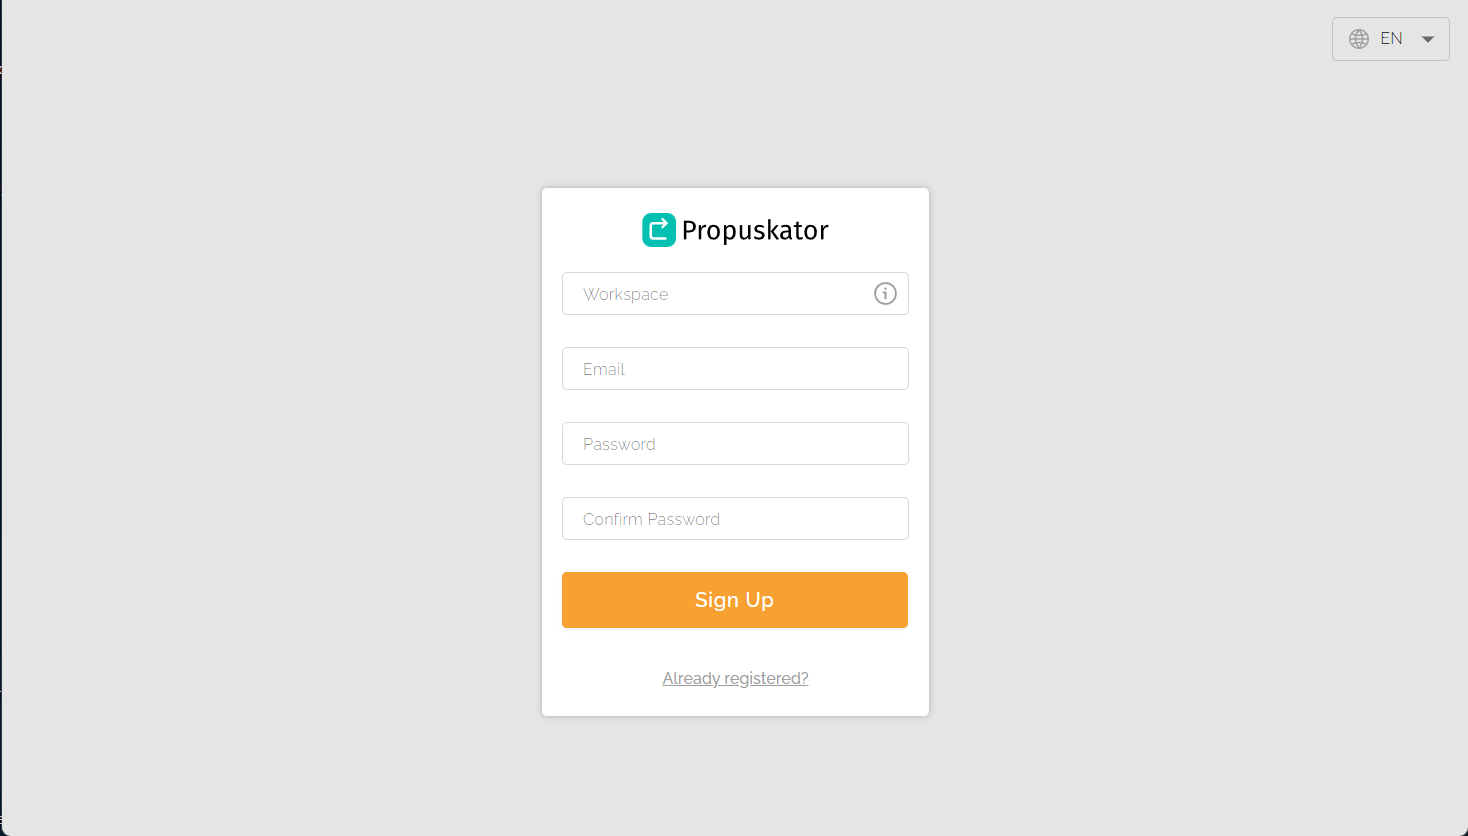
- Go to the registration form following the link: https://cloud.propuskator.com/register.
- Think of a name for your workspace, enter the Administrator’s email and create a strong password.
- Click the “Sign up” button.
What is a workspace? This is the unique name for your account that other users will use when they sign up. You can specify the name of your company, office center, or housing estate. The name of each workspace is unique; no one except you and the users you invited will use it.
Configuring the Propuskator controller and linking access points
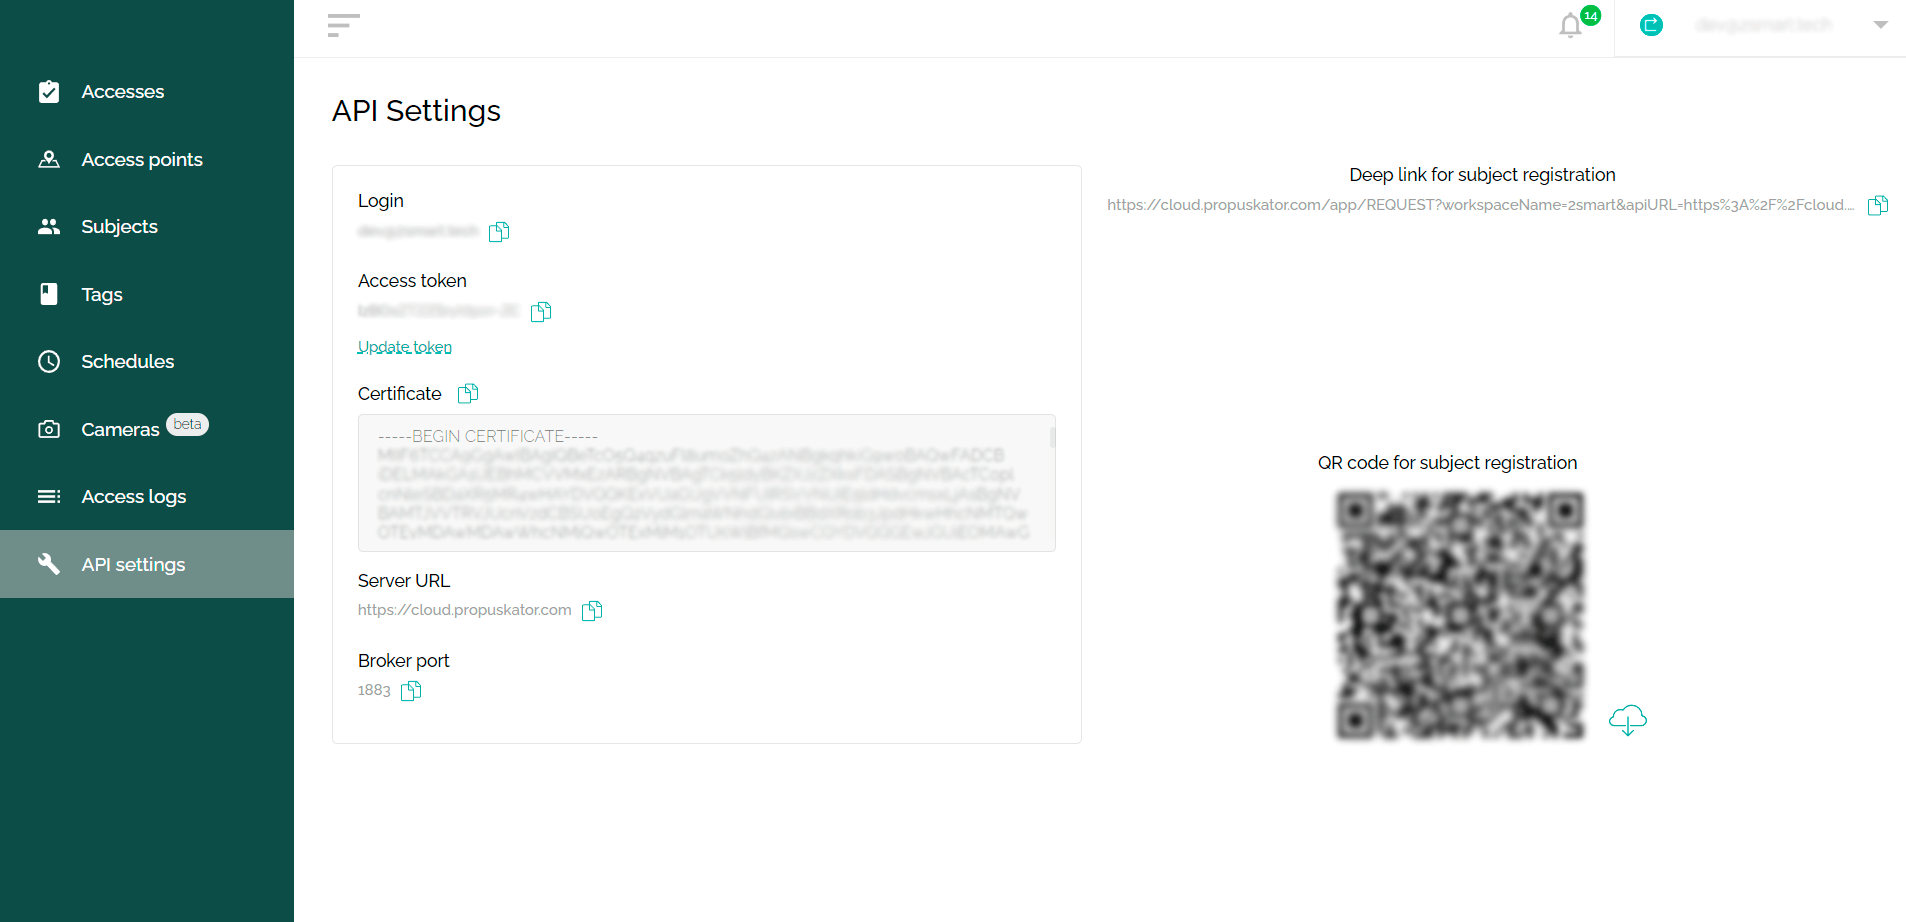
Now you need to configure the Propuskator controller to work in your ACS. To do this, go to the “API settings” section in the web interface. Here you will get all the necessary data to configure the controller.
- Leave the API settings page open.
- Go to the Wi-Fi settings of your device (laptop, tablet, or phone) and find the hotspot of the enabled controller. The hotspot name is the mac-address of the device (in the screenshot, this is “CP-e0-e2-e6-d8-d1-78”; in your case, the character set will be different).
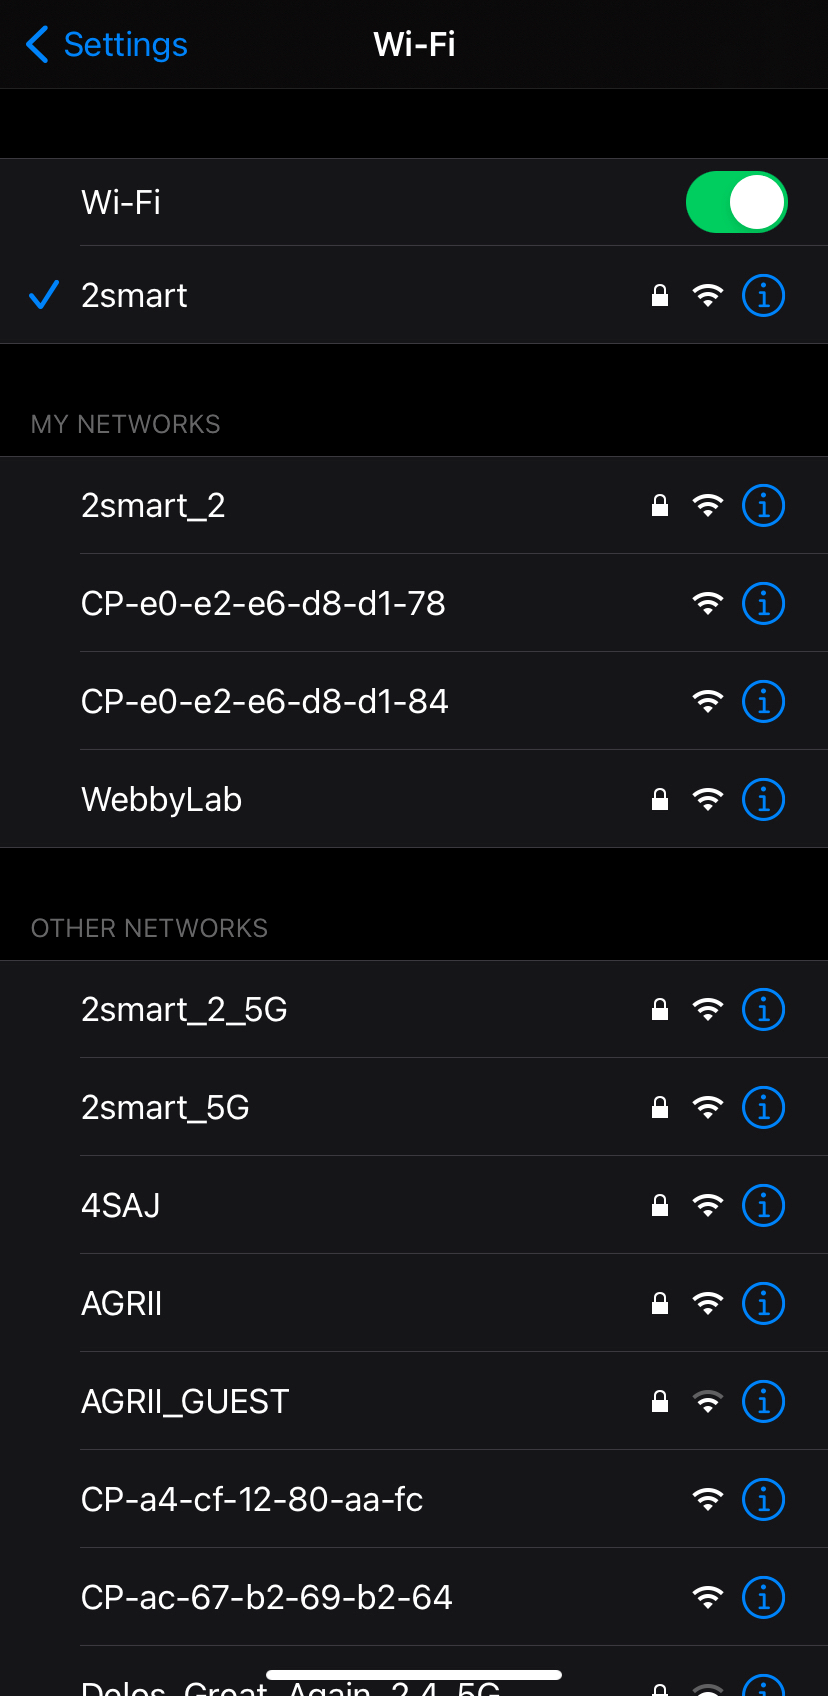
- Connect to the controller hotspot.
- Enter the device address — 192.168.4.1 — in the browser’s address bar and enter the controller interface.
- Go to the “Credentials” – “Propuskator” tab.
- Copy the “Login”, “Token”, and “SSL Certificate” fields from the Propuskator web interface (the “Server URL” and “Broker Port” fields are already filled in by default). Use the “Copy text” icon next to each entry for a quick copy.
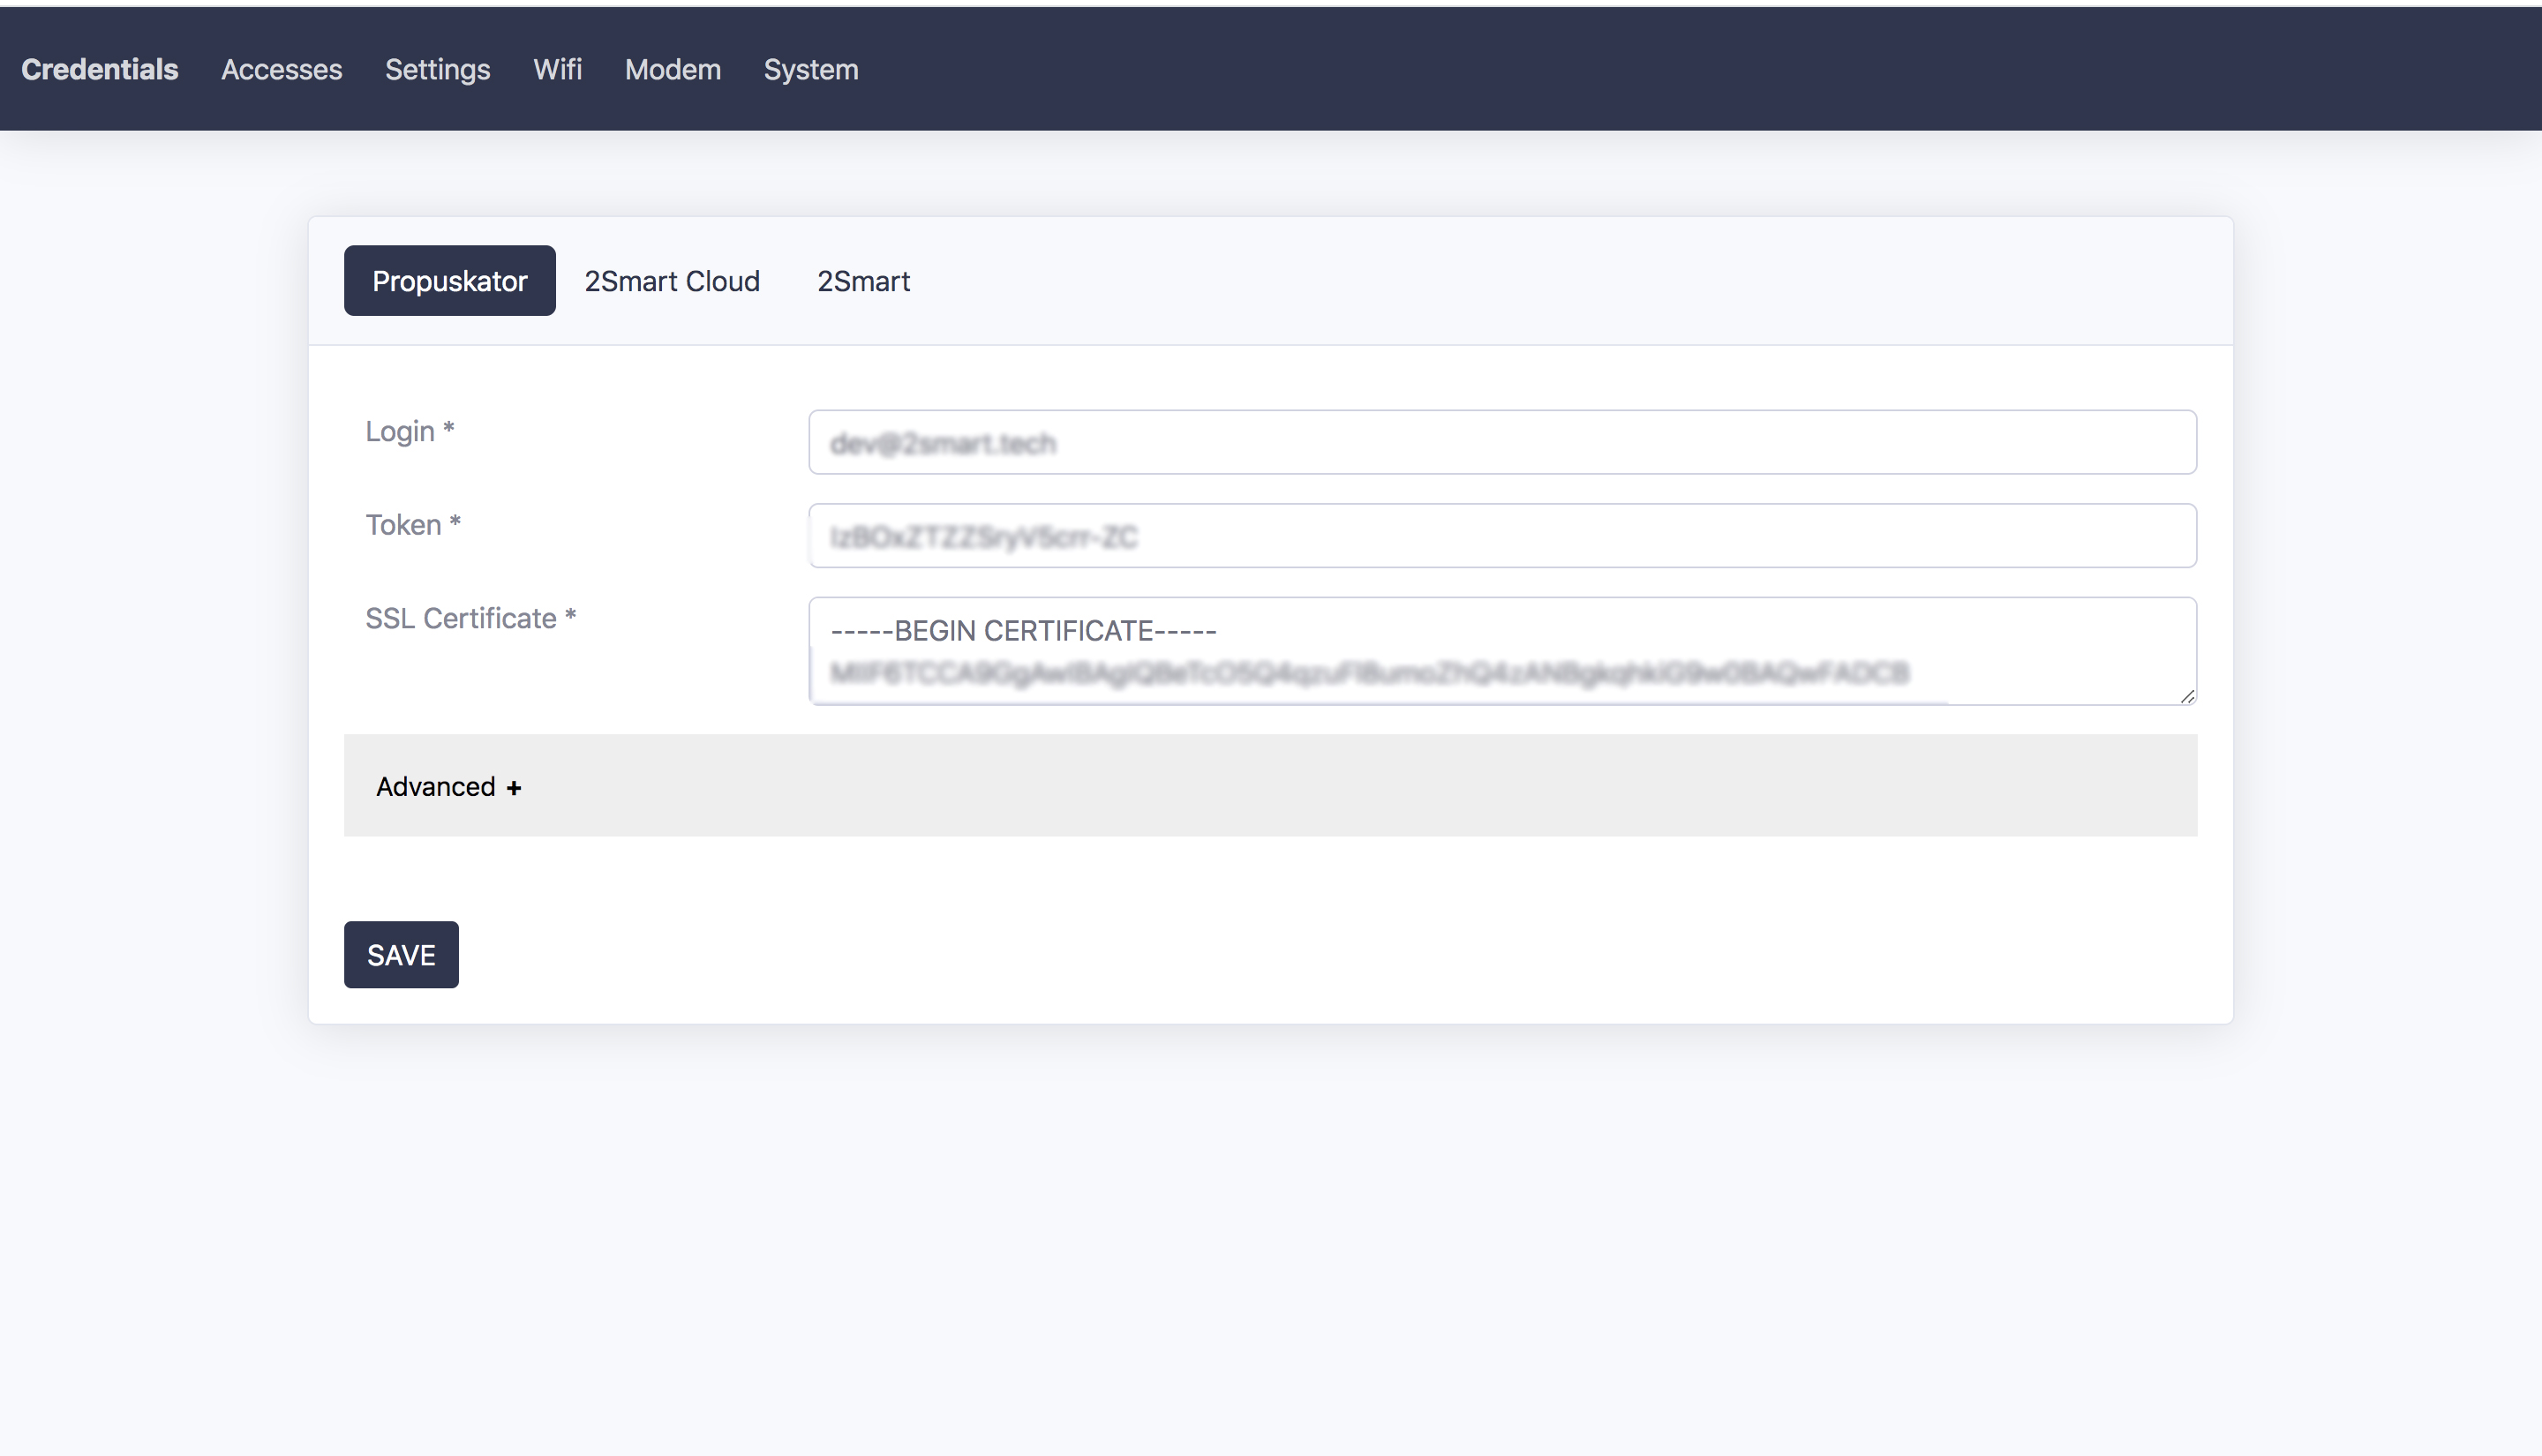
- Click “Save”.
Please note that the controller will reboot, and your device may automatically revert to your home or office Wi-Fi network. When proceeding with the following steps, ensure you are still connected to the controller’s hotspot! - Go to the “Wifi” tab and select your home or office network (Please note: only 2.4GHz Wi-Fi networks are supported!).
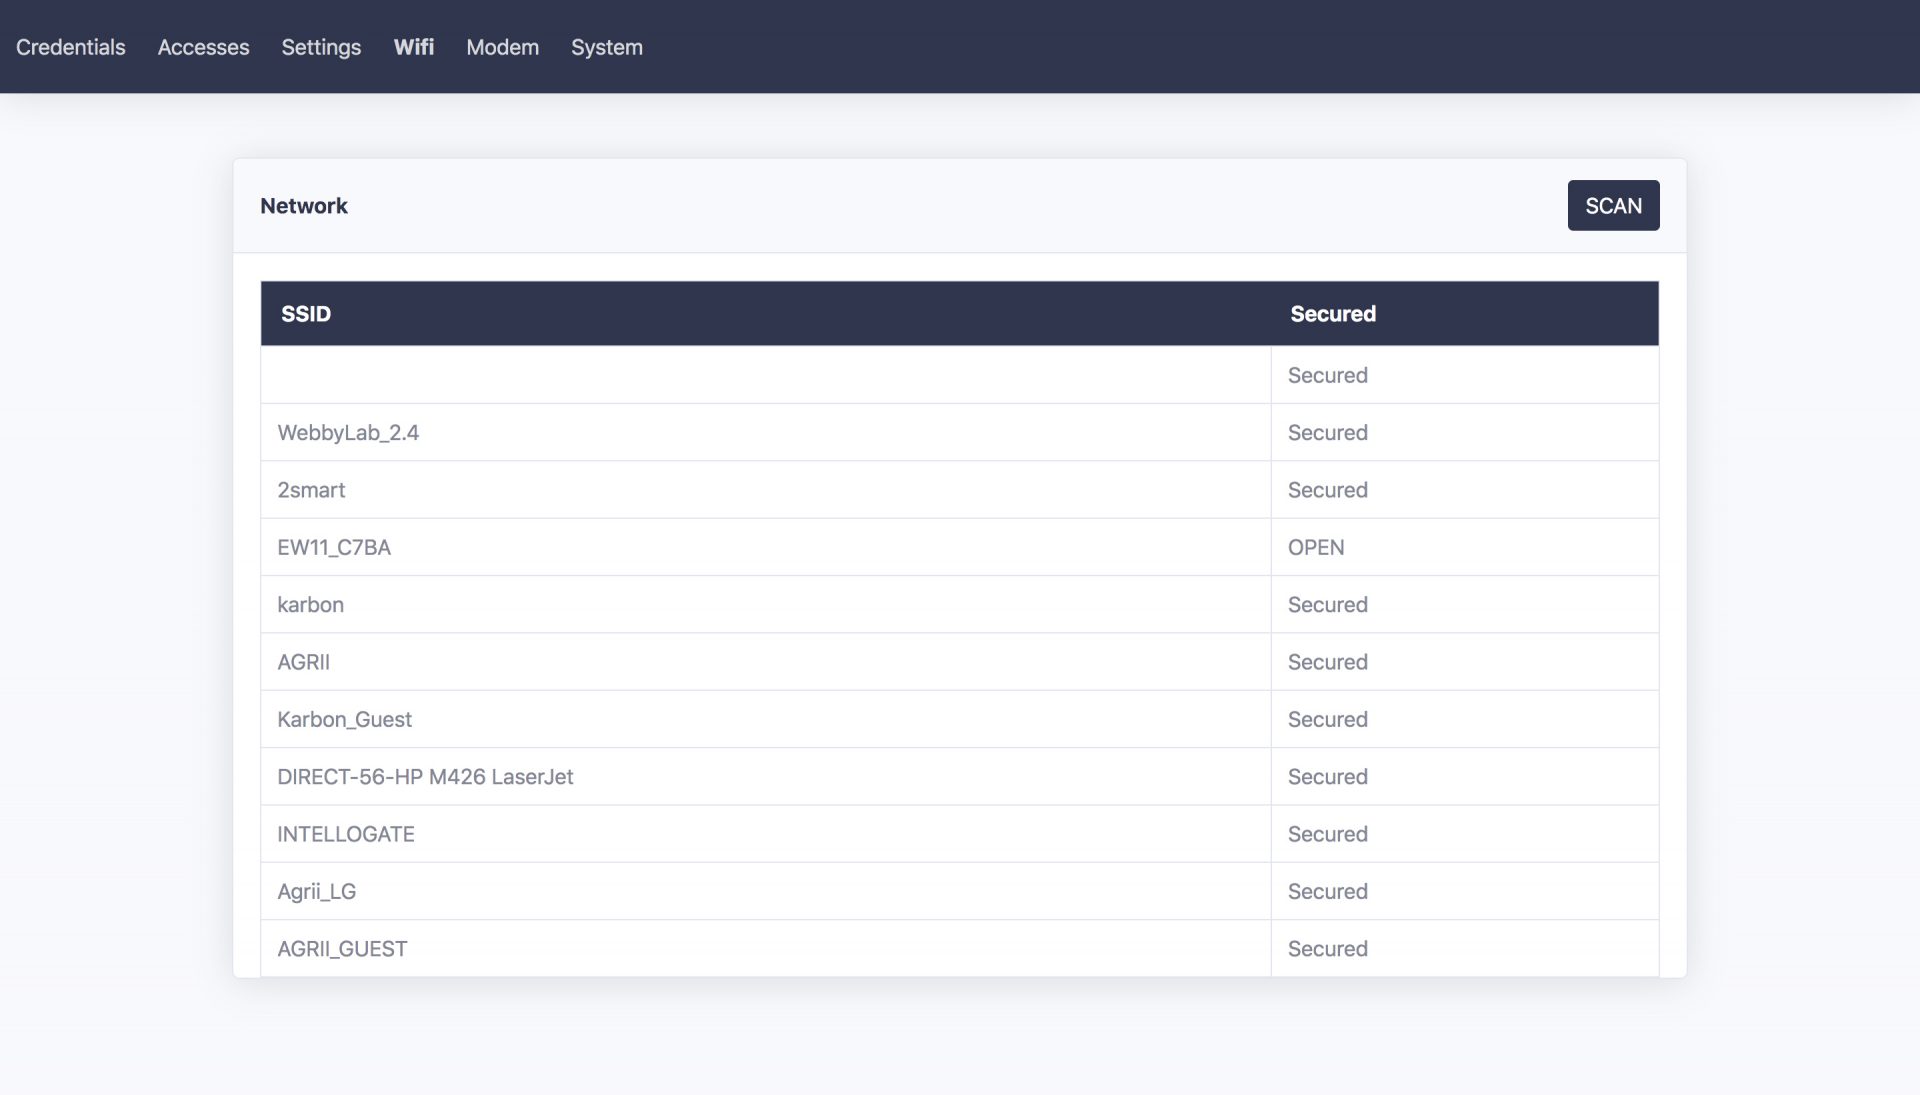
- Enter your network password and click “Save”.
- Return to your regular Wi-Fi network and wait for the controller to reboot.
The controller is now connected to your network – a corresponding notification will appear in the web interface. After linking the controller, you can proceed with further settings.
Configuring Access Points
An Access point is a specific door with an electric lock, a gate, or a barrier with an electric drive, which can be controlled using the Propuskator ACS.
To add a new point, do the following:
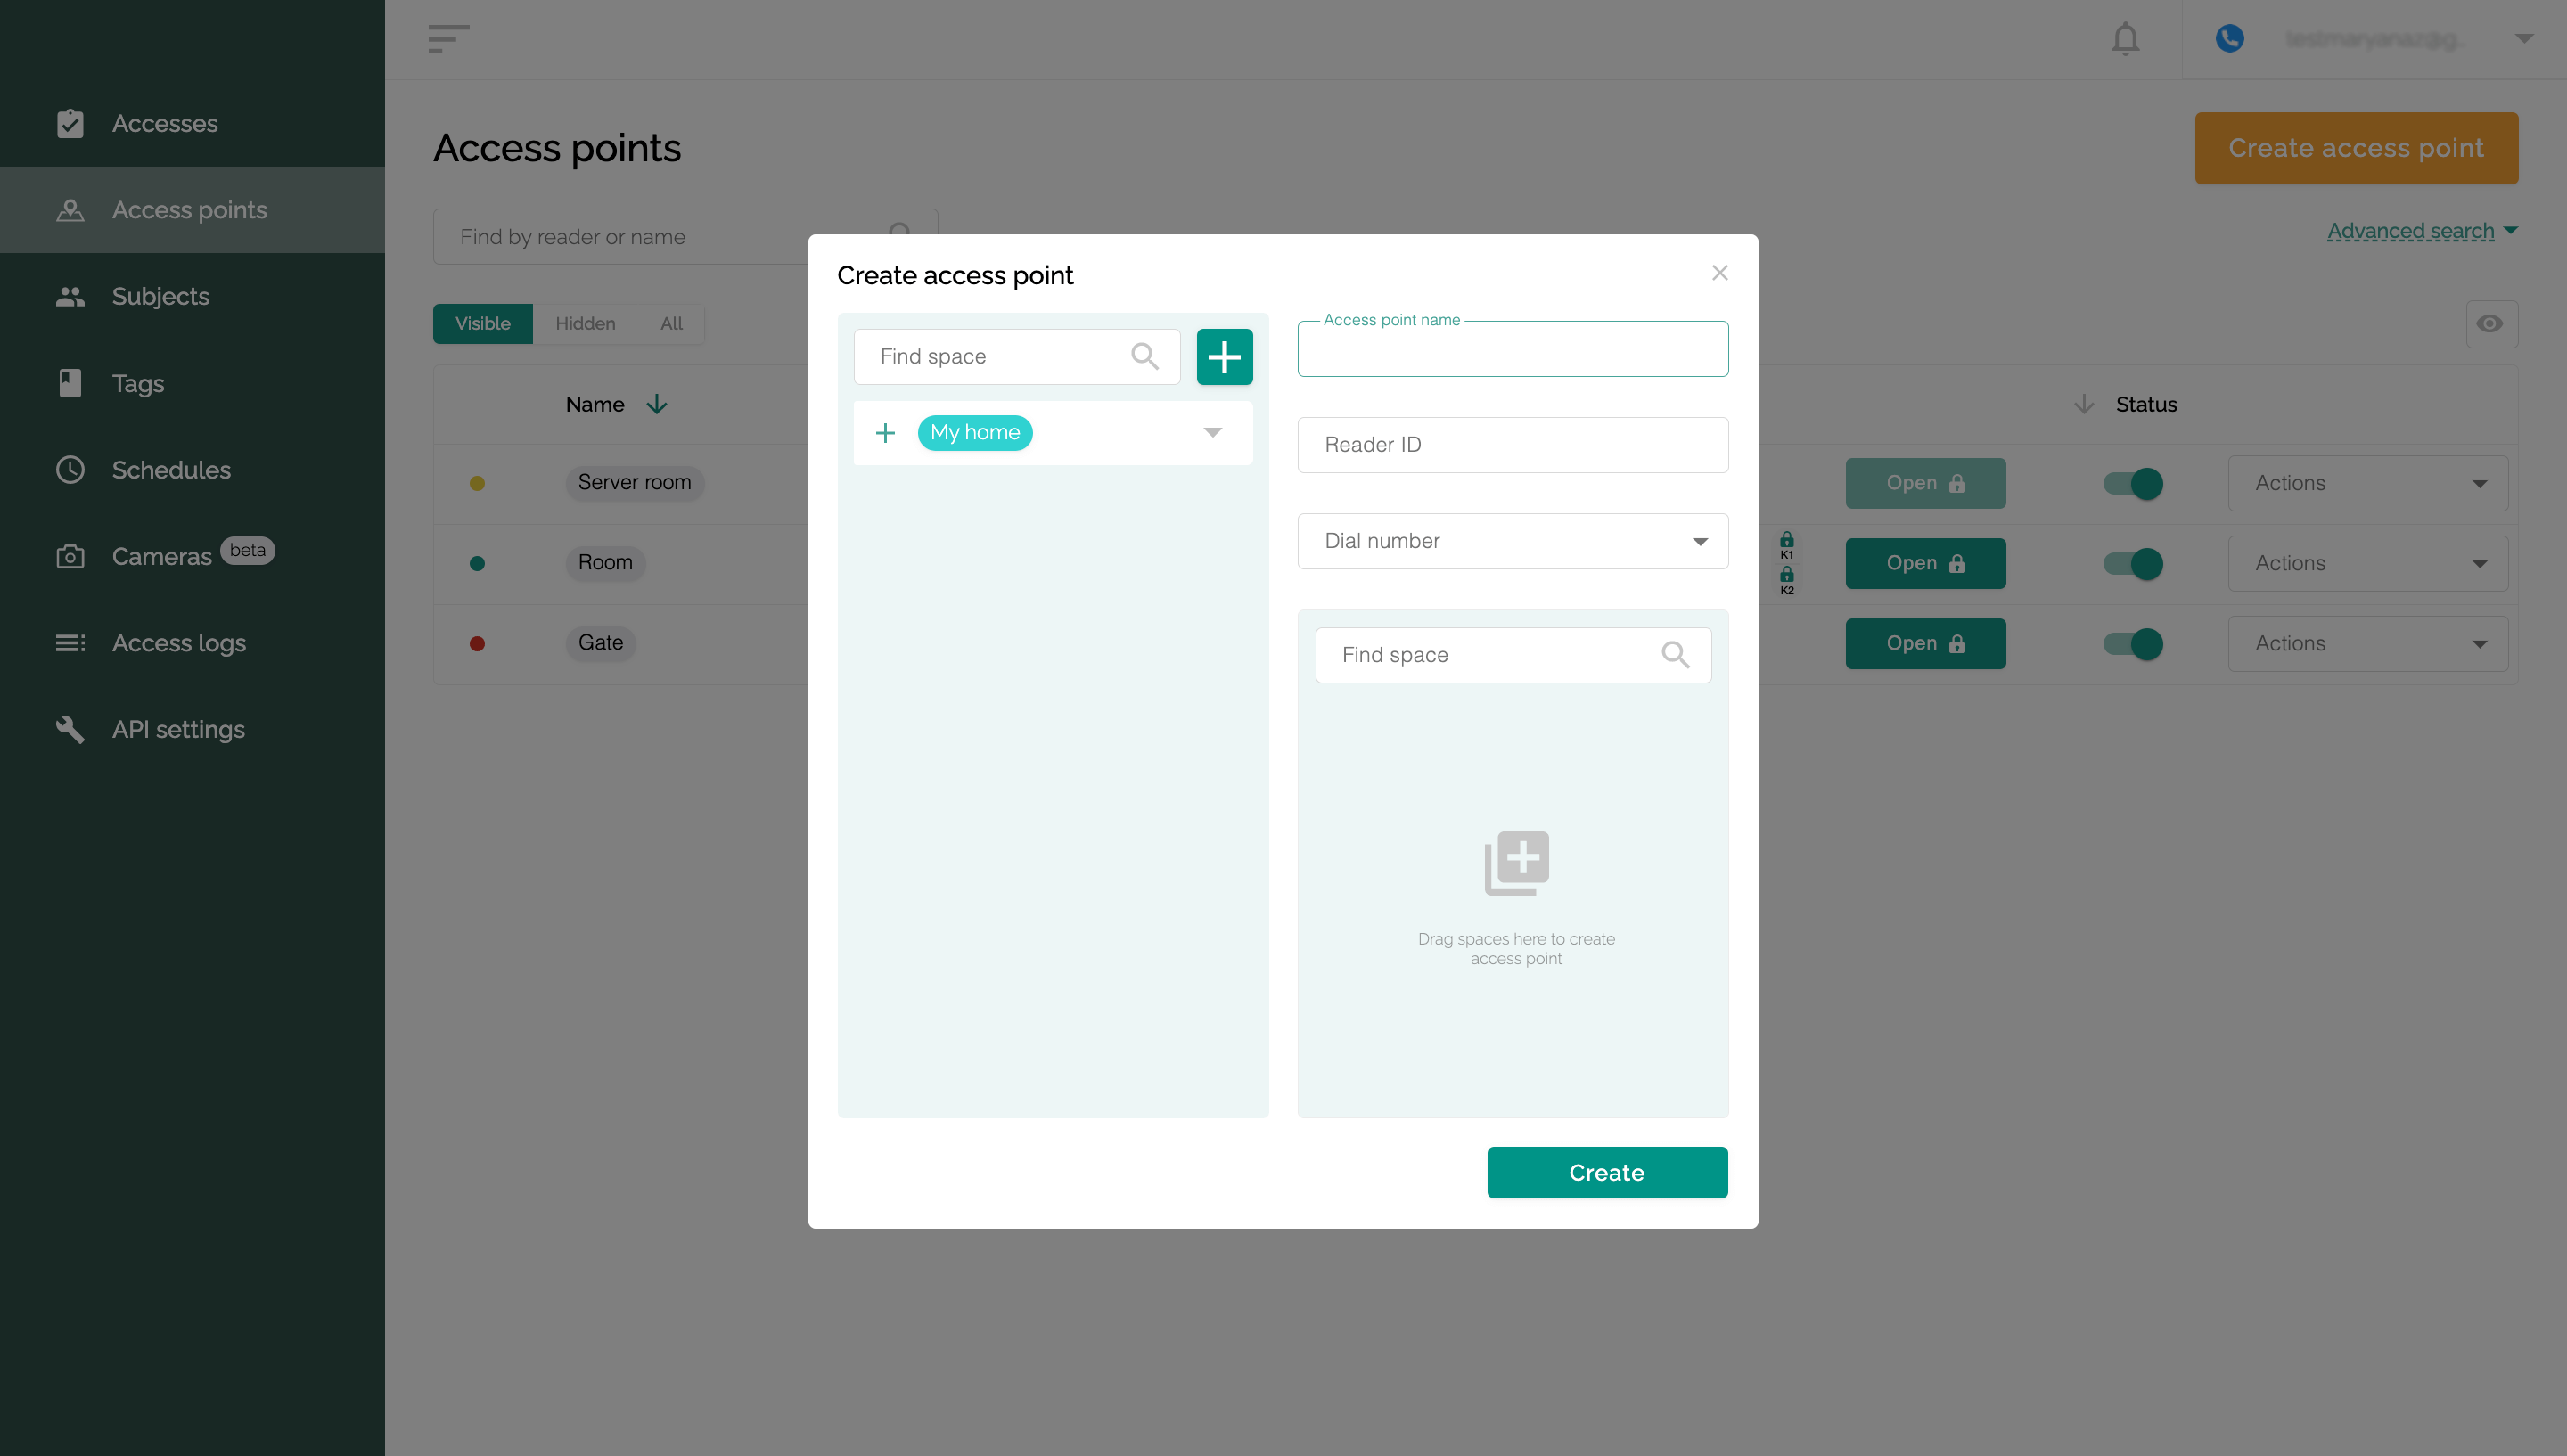
- Go to the “Access points” tab.
- Click “Create access point”.
- Enter a name for the new point (for example, “Garage Gate”).
- Specify the ID of the tag reader that is used at this point – the ID is loaded automatically if the reader is connected to the controller.
- Optionally, add an access point to an existing space (or multiple spaces). To do this, select the necessary spaces in the list on the left by dragging them into a special field or clicking on the “+” next to the name of the space.
- Click “Create”.
Creating spaces
For the convenience of Propuskator ACS users, access points can be grouped into spaces. You can make the necessary settings in the ACS web interface.
Space is a collection of multiple access points. An example of a simple space is an office with two entrances and five interior doors controlled by ACS. All seven access points of this office can be combined into one space.
However, the same access points can be included in other separate spaces. These can be access points at the entrances to the office and at the entrance to a separate room – employees who are not allowed to enter other rooms will be able to use such a space.
Grouping access points into spaces makes it easier to set permissions for users. It is enough to specify that the subject has access to the entire space, and you do not need to provide separate access to each access point.
To add a new space, do the following:
- Go to the “Access points” tab.
- Click “Create access point”.
- At the top of the left column (list of spaces), click the “+” icon to add a new space.
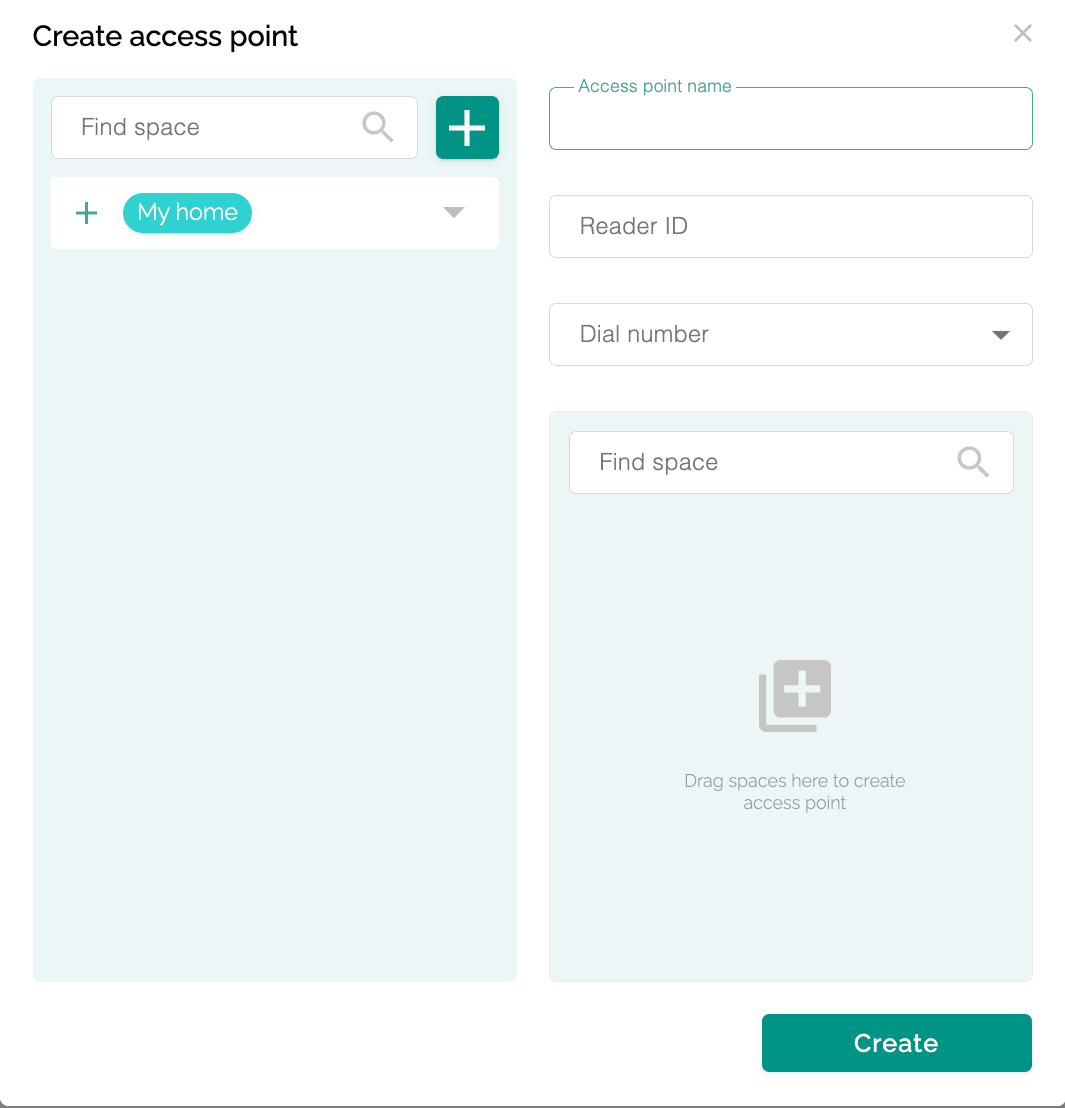
- Specify a meaningful name for the space, such as “Office”. Optionally, choose a color that will visually distinguish the space from others – this is convenient to separate similar spaces.
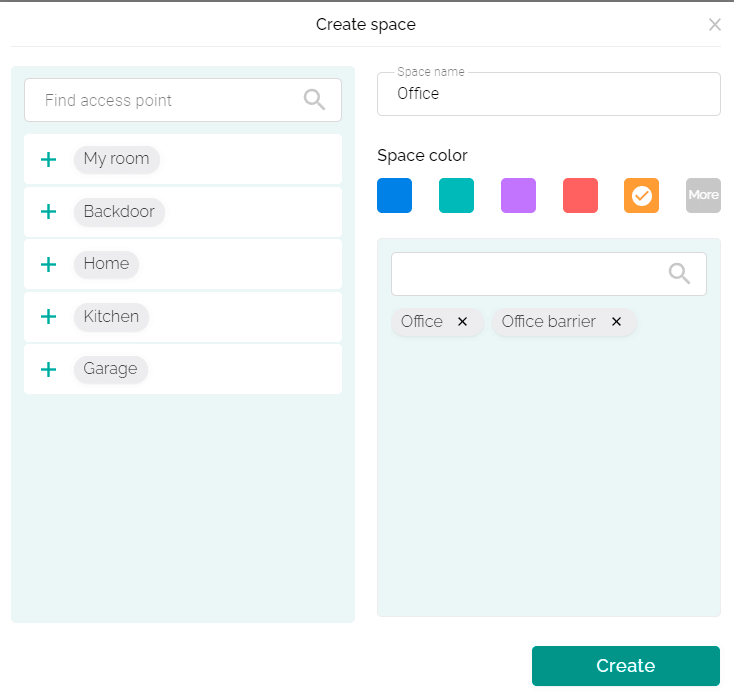
- Add access points that belong to this space by clicking on the “+” next to their name in the list or by dragging them into a special field.
- Click “Create”.
Creating tags
A tag is a virtual key for managing an access point. It can be an RFID card, bracelet, pipette, NFC tag, etc. To use tags, you need special devices – readers.
There are two methods to add a new tag.
Method one:
- Scan the new tag with the reader connected to the controller.
- A notification will appear in the web interface with the “Create tag” button. Click on it.
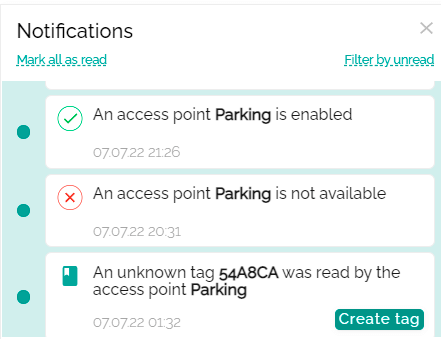
- In the window that appears, enter the name of the new tag, do not change its code.
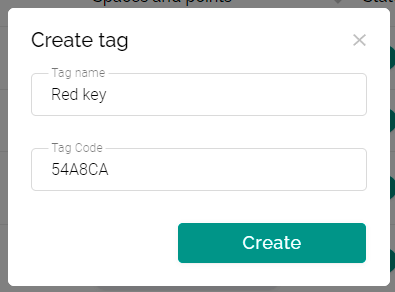
- Click “Create”.
Method two:
- Go to the Tags tab.
- Click the “Create tag” button.
- Enter the tag name and code (you need to know the code).
- Click “Create”.
Registration of users and setting access rights
You can add new users on the Subjects tab. Click the “Create subject” button, specify the required information and configure the basic rights:
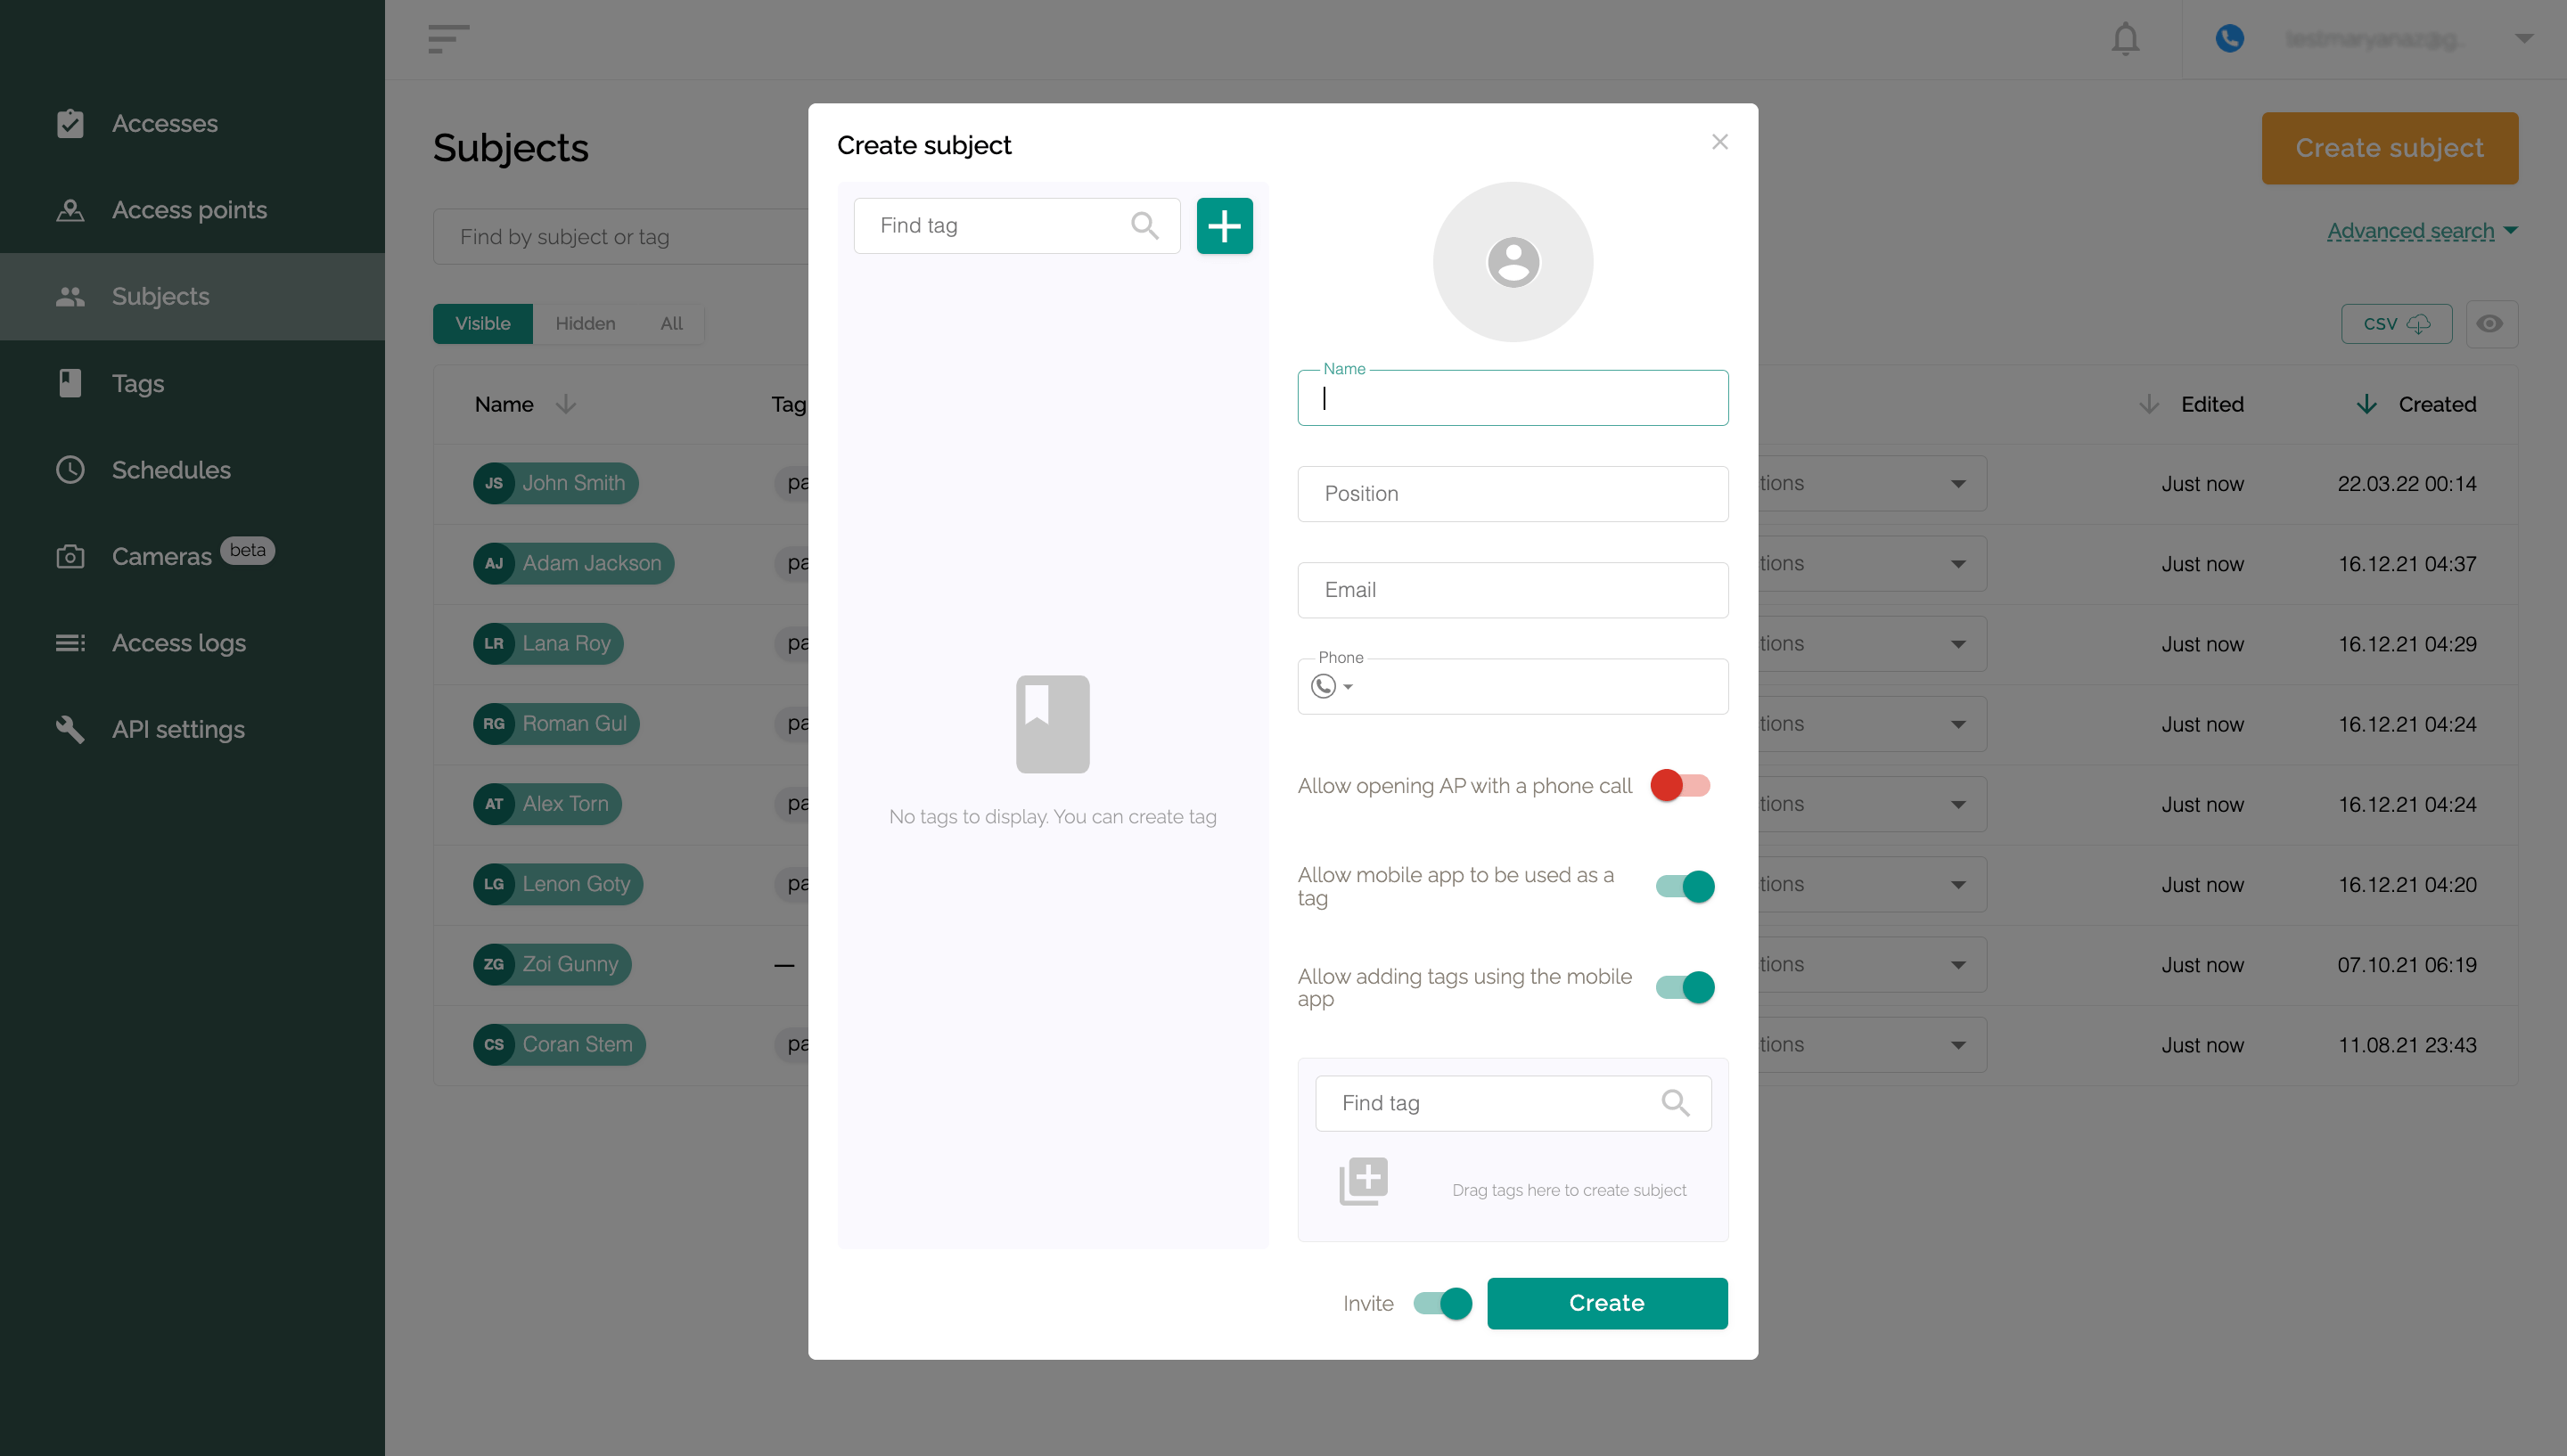
- Enter the user’s name and email; these are required fields.
- Optionally, add the user’s working position and phone.
- Specify whether you allow the subject to open AP with a phone call, use the mobile application as a tag, and add tags using the mobile app.
- Click “Create”. If the “Invite” checkbox is checked next to the button, the new user will receive a notification to the Email specified in the settings. You can uncheck this box if necessary.
If you add a user when the tags for access have already been created and registered, you can link the desired tag to the subject at the stage of its registration in the system.
Setting up schedules
Use schedules to restrict access to specific users based on the time of day and day of the week.
Three schedules are already created on the Schedules tab by default:
- Full access – no time limits.
- Working hours – Monday to Friday, from 8:00 a.m. to 8:00 p.m.
- Weekends – Saturday and Sunday with no time limit.
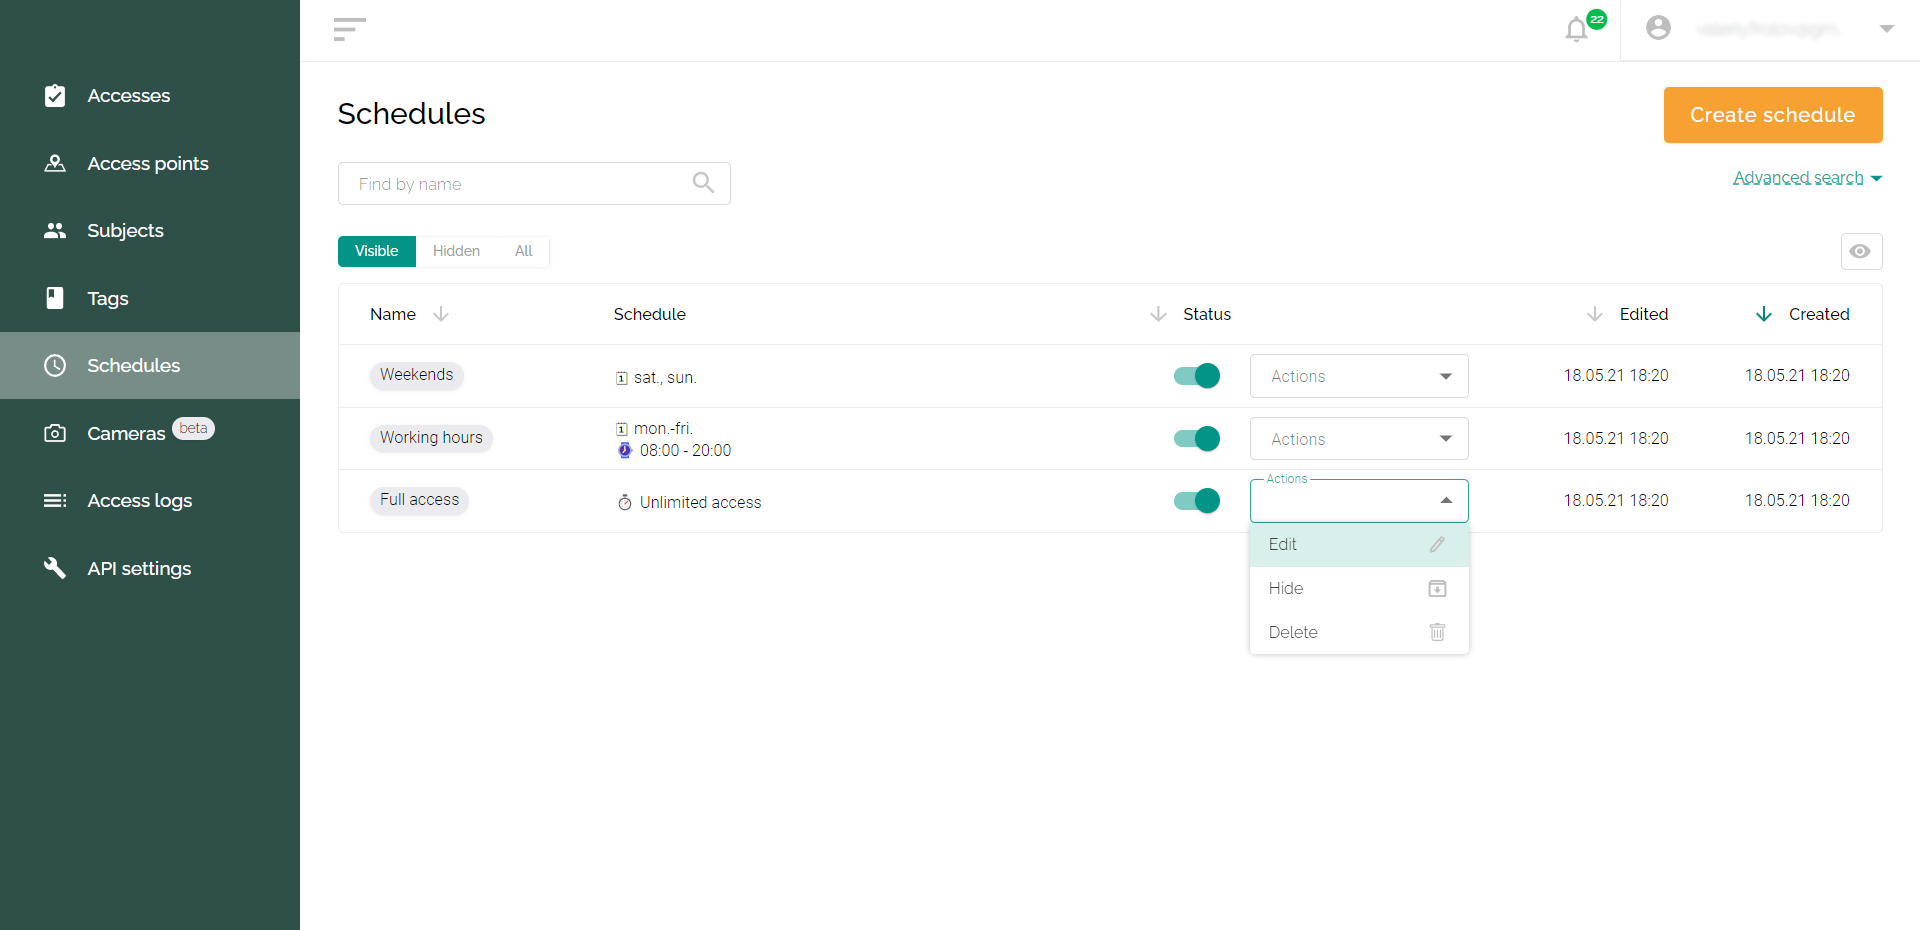
To edit existing schedules (for example, to specify the working hours on weekdays), select “Actions” – “Edit”.
To create a new schedule, do the following:
- Go to the “Schedules” tab.
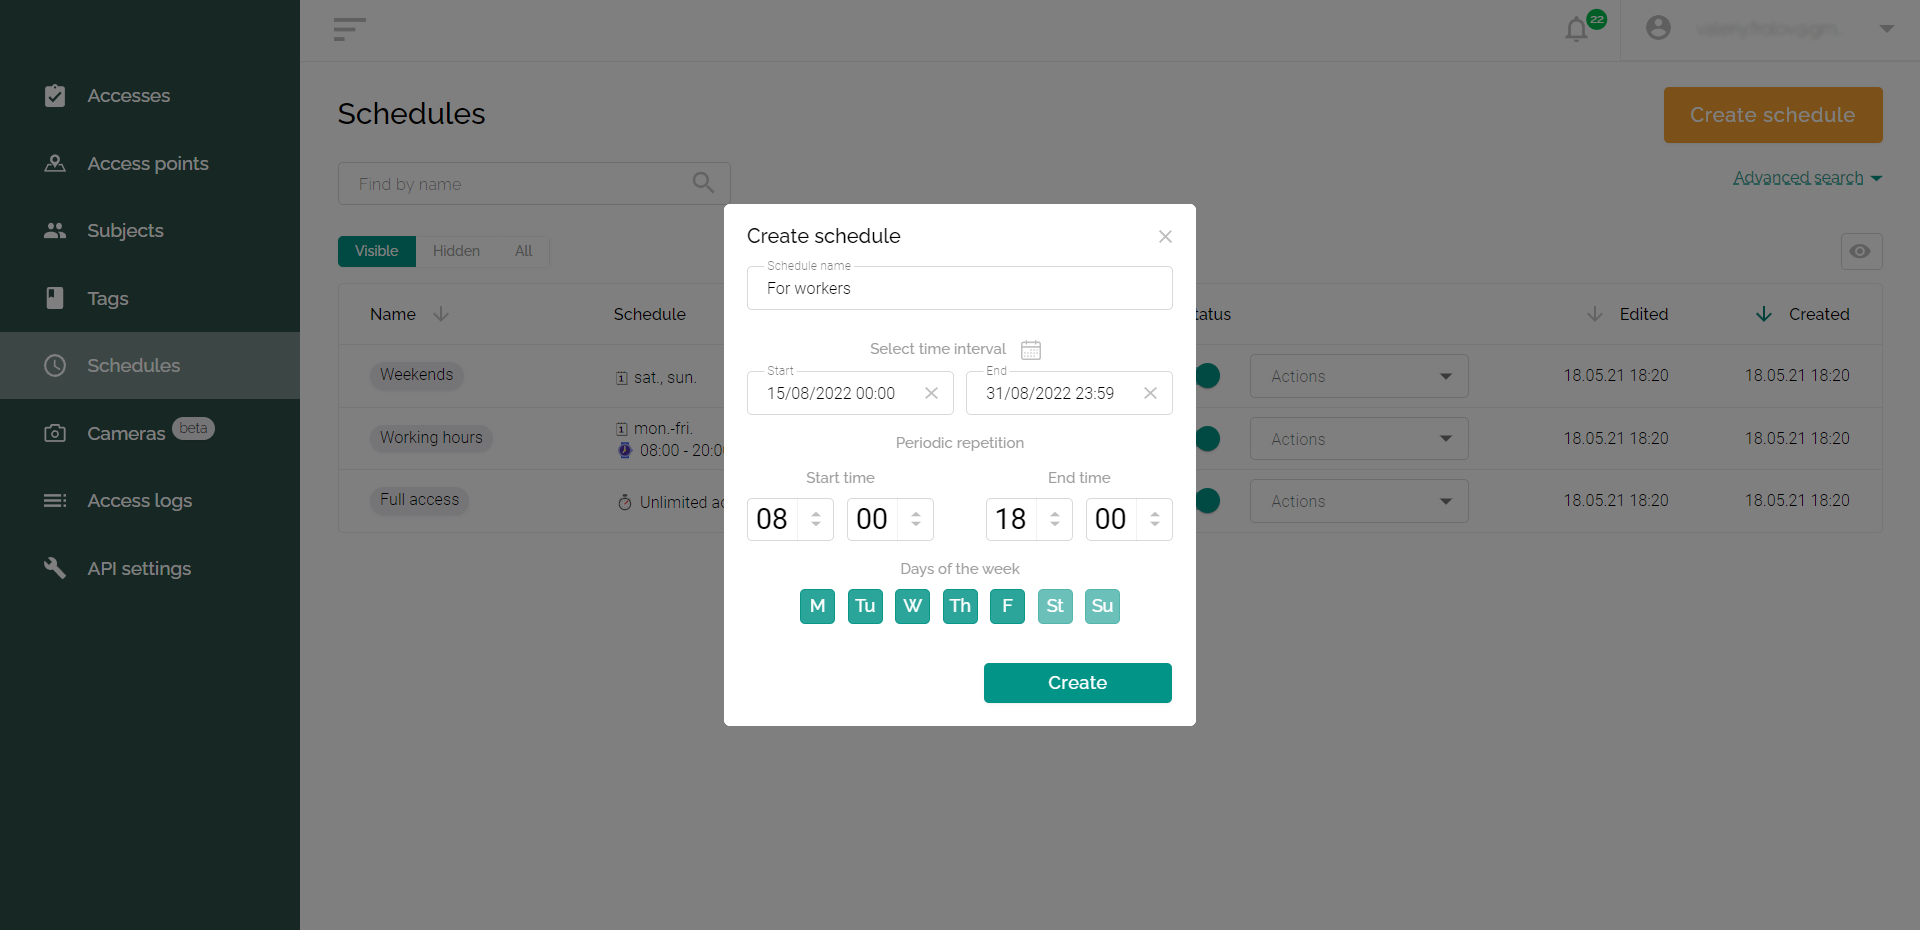
- Click the “Create schedule” button.
- Enter a schedule name.
- If necessary, fill in the time interval (if you want to provide temporary access for several days, weeks, or months).
- Select the start and end times for the daily access (for access without time of day restrictions, do not change anything).
- Select the days of the week on which scheduled access will be available.
- Click the “Create” button.
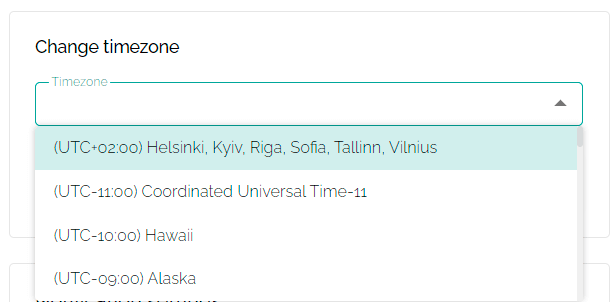
Please note! For the access schedules to work correctly, you must set your time zone in your account settings.
Camera connection
You can associate any access point and surveillance camera installed on it. This will allow you to view video and listen to audio from the camera directly in the web panel. Any cameras with RTSP stream are supported.
To add a camera, do the following:
- Go to the “Cameras” tab.
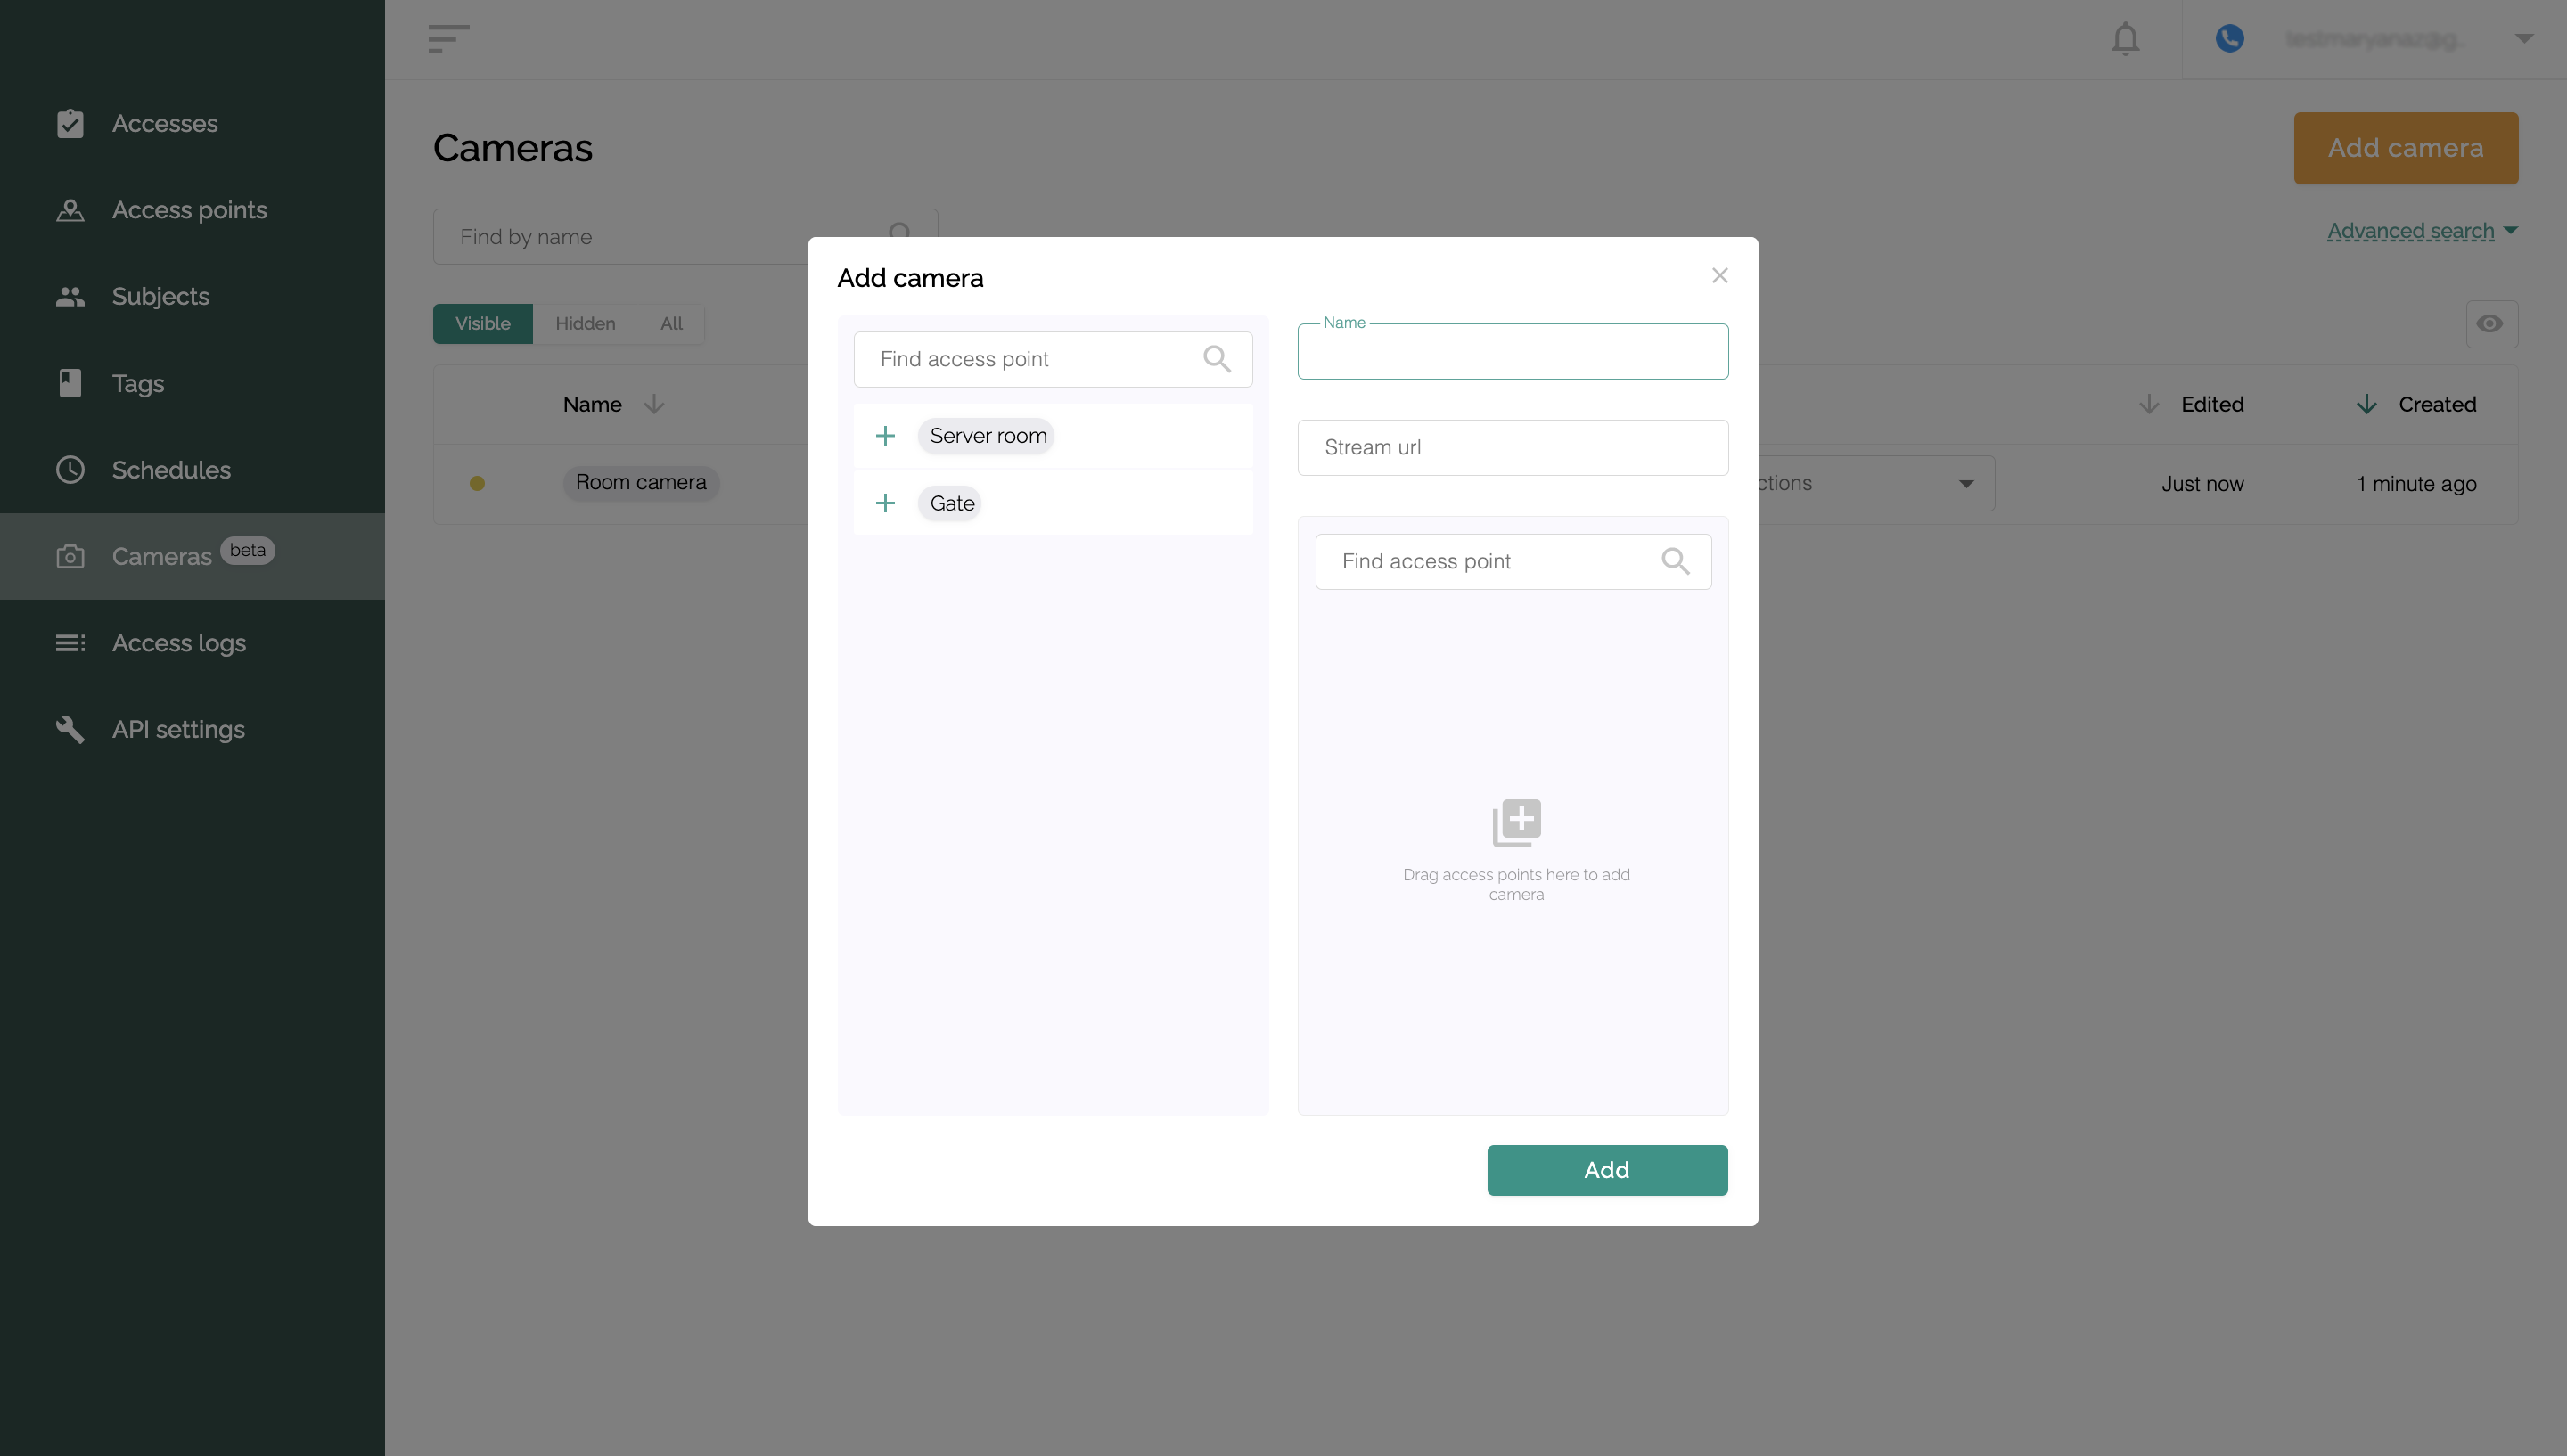
- Click the “Add camera” button.
- Specify a camera name (eg, “Office Entrance”).
- Enter the camera stream URL (you can find it in the camera settings).
- Select one or more access points that the camera is associated with by clicking on the “+” next to their name or by dragging the point into the special field.
- Click “Add”.
Setting up accesses
After completing the basic settings, you can flexibly configure users’ access rights. For example, allow a specific employee to enter only certain rooms and only at the time allowed for them.
- Go to the “Accesses” tab.
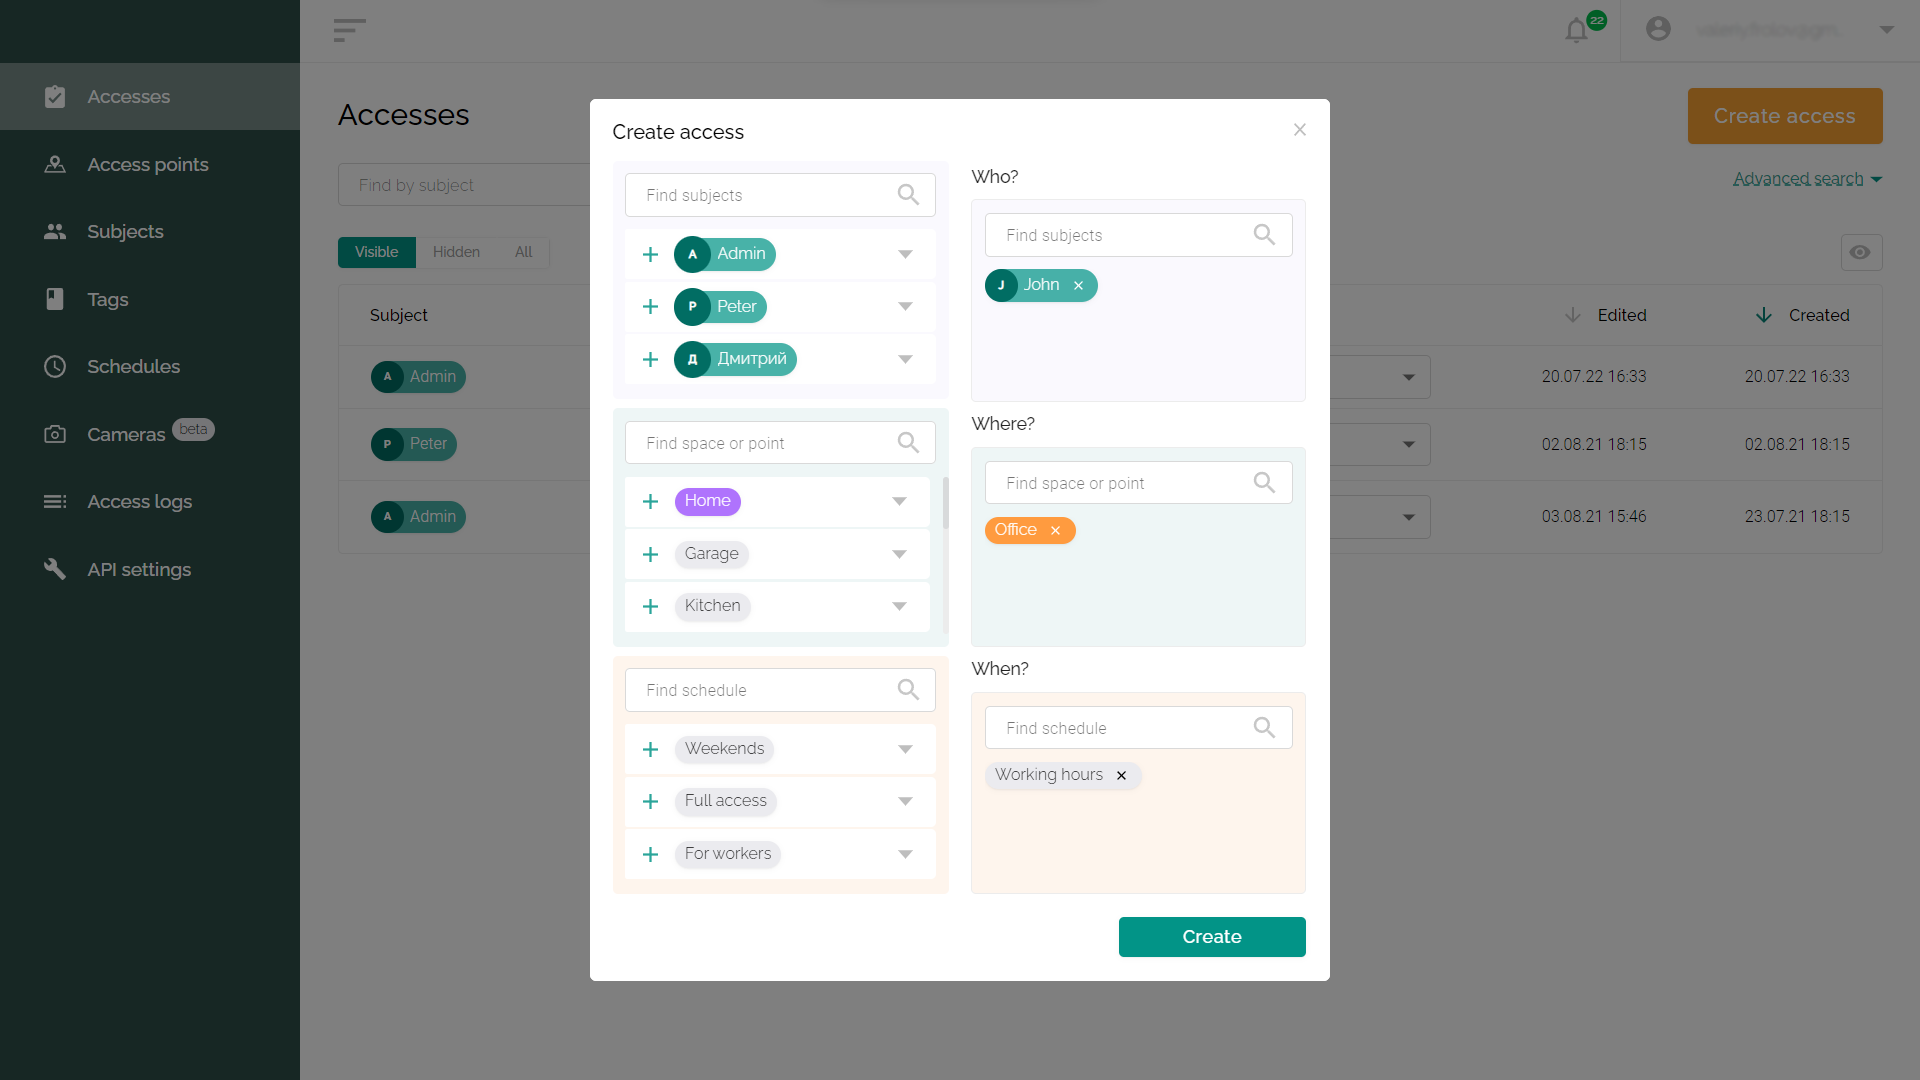
- Click the “Create access” button.
- Add one subject or multiple subjects that will get the same rights.
- Select the spaces that the specified subject will have access to.
- Select one or more access schedules for the subject.
- Click the “Create” button.
Access logs
The access logs are intended for the Propuskator ACS administrator to control the use of the system by subjects. The log contains detailed information about all attempts to open access points, including denied ones. It will help control labor discipline or investigate possible incidents on your territory.
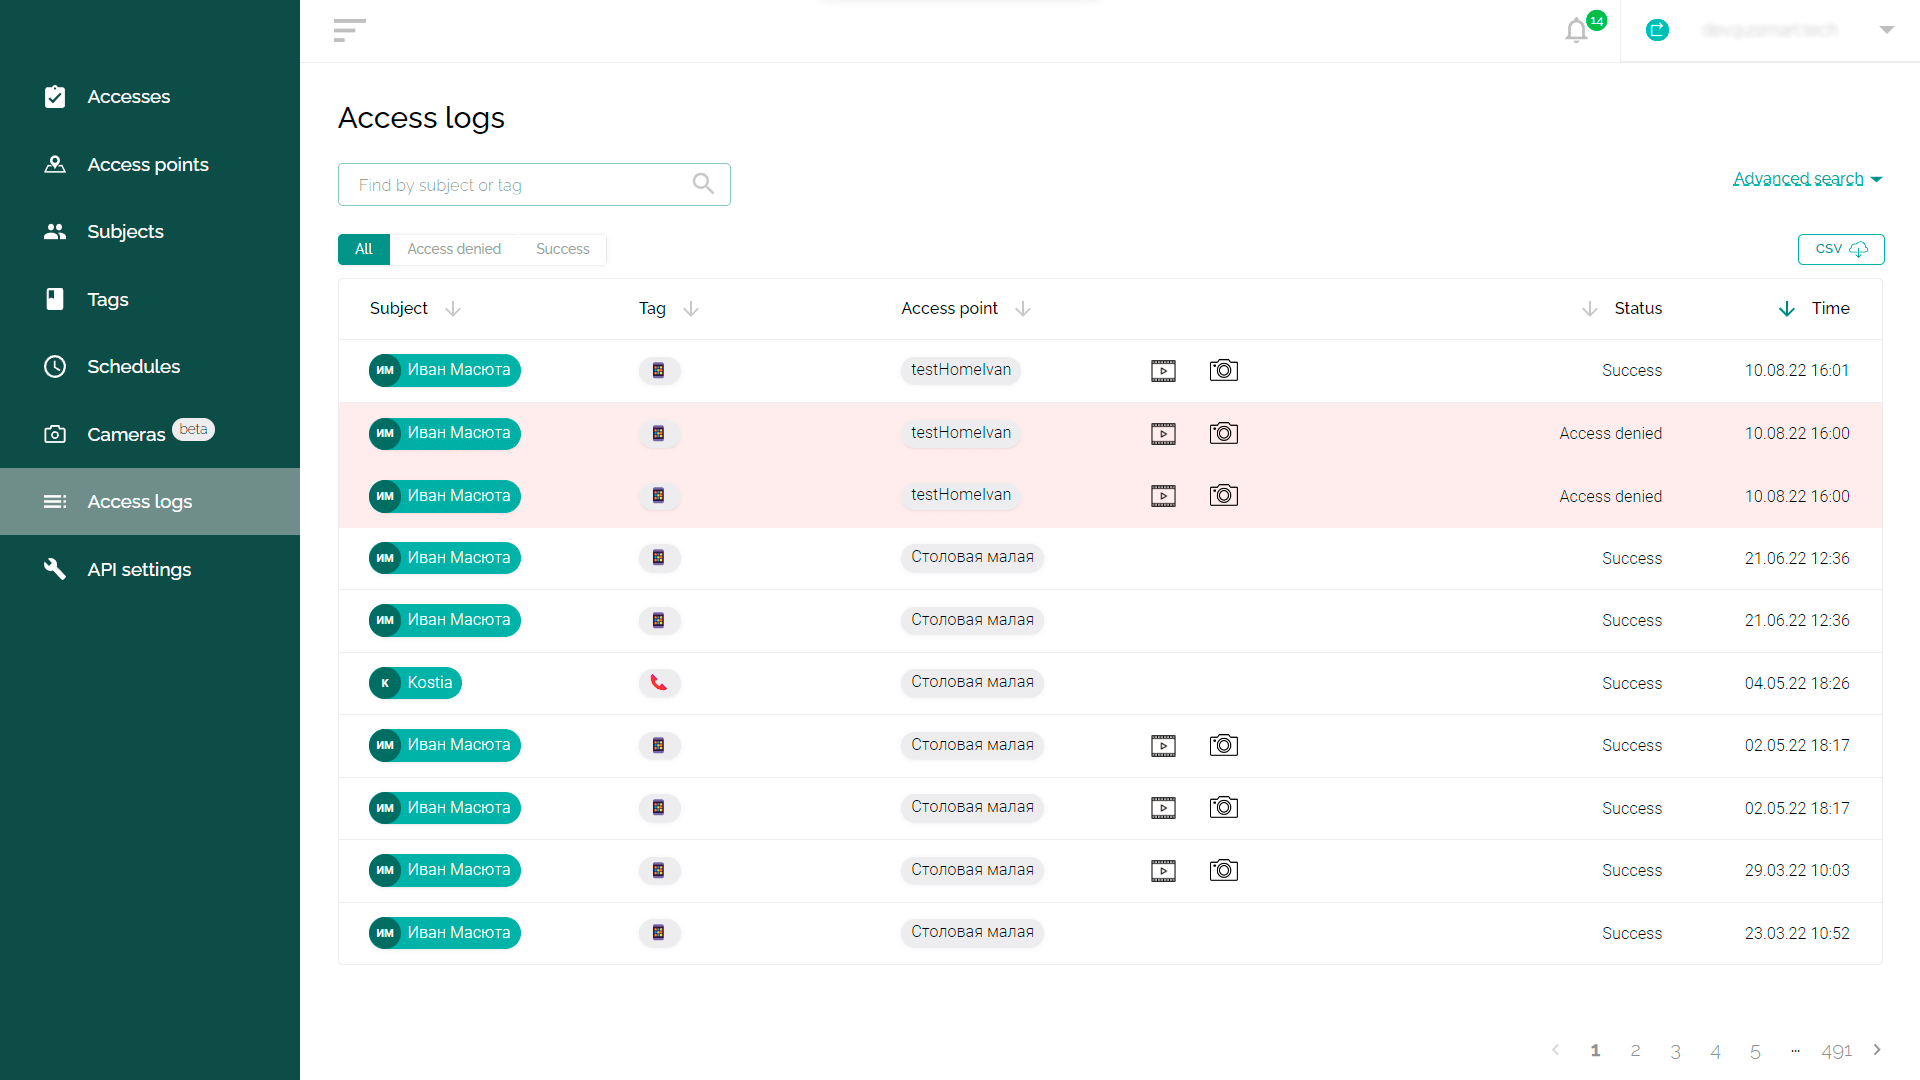
The search bar will help you filter log entries by specific users or tags.
By default, you can see all access attempts, both successful and unsuccessful. Additional tabs “Access Denied” and “Success” will help to separate one from the other.
Account settings
To go to your account settings, click on your Email in the upper right corner of any web interface page. In the menu that appears, select the “Account Settings” item.
- Workspace avatar – you can add your photo, company logo, etc. (subjects will see the avatar in the mobile app).
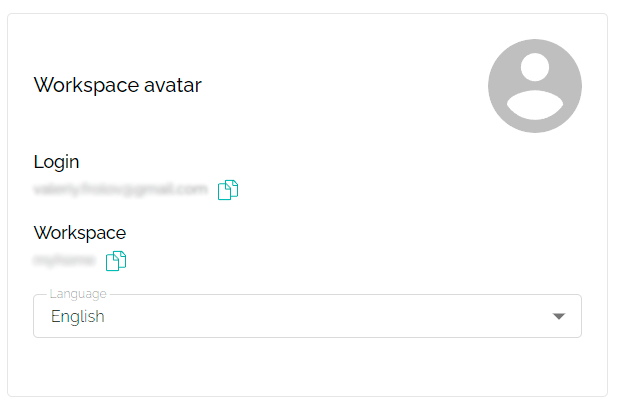
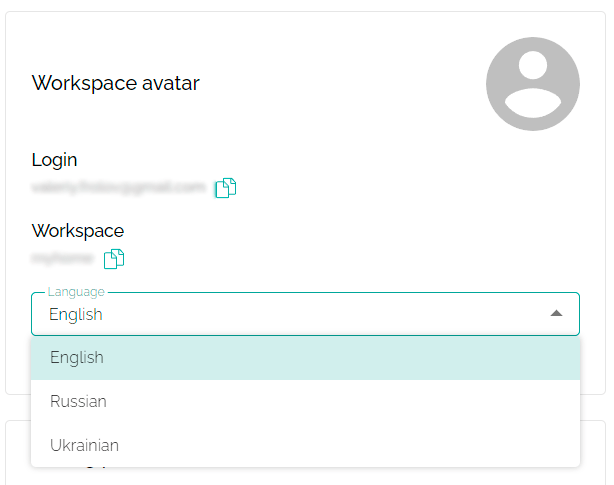
- Web interface language selection — Ukrainian, Russian and English versions are available.
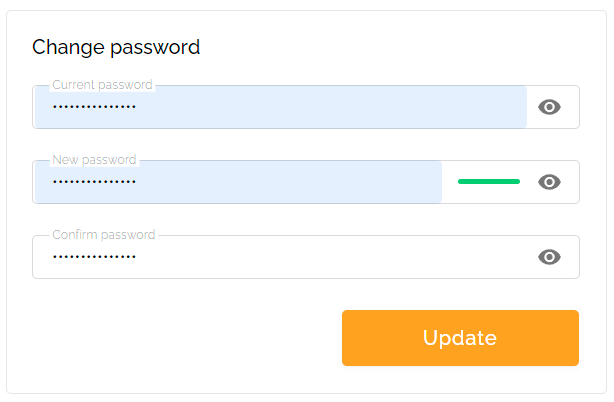
- Change password – you can set a new password to access your account at any time.
- Change timezone – the correct functioning of the schedules depends on this setting.
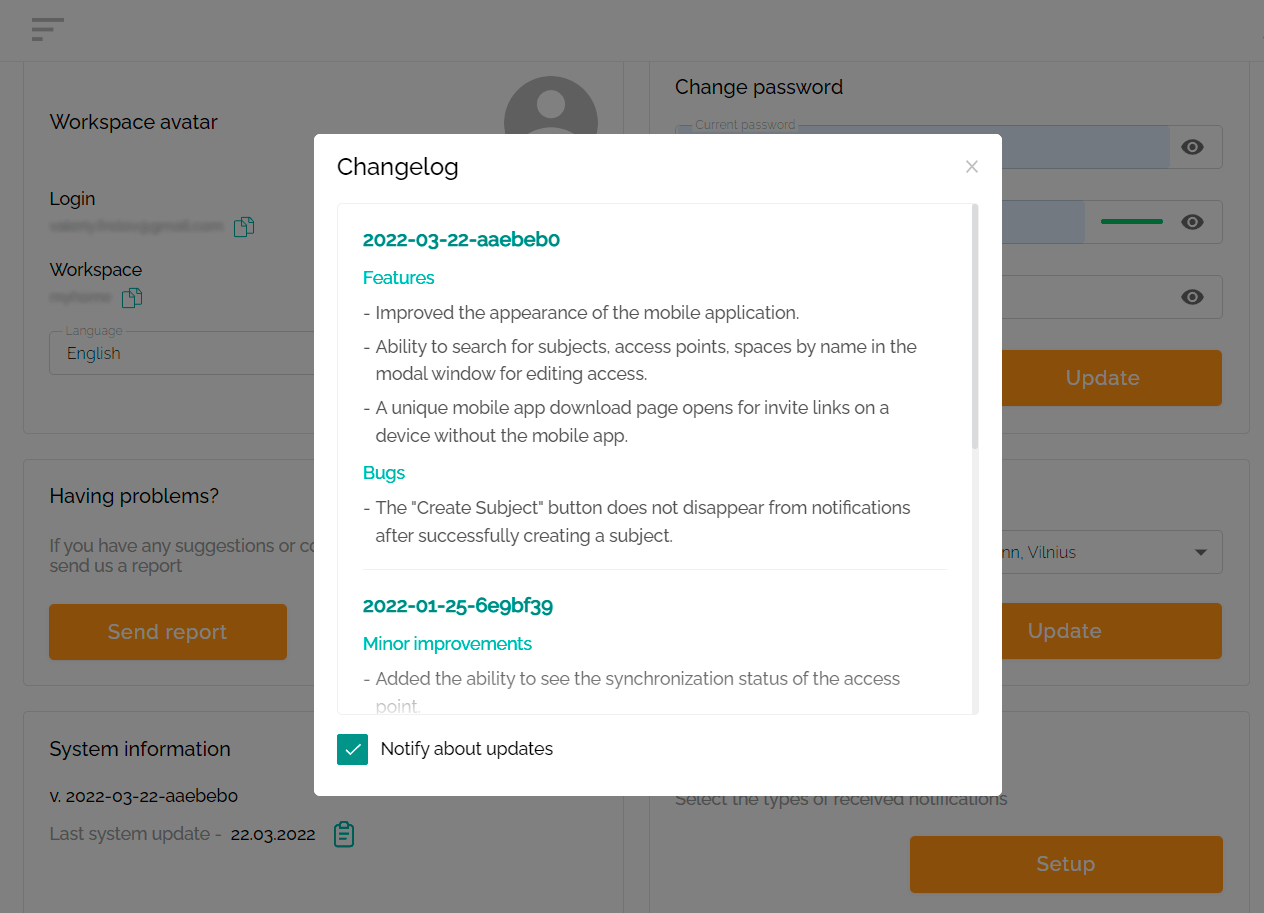
- System information – here you can find out about the latest updates and new features of the web interface.
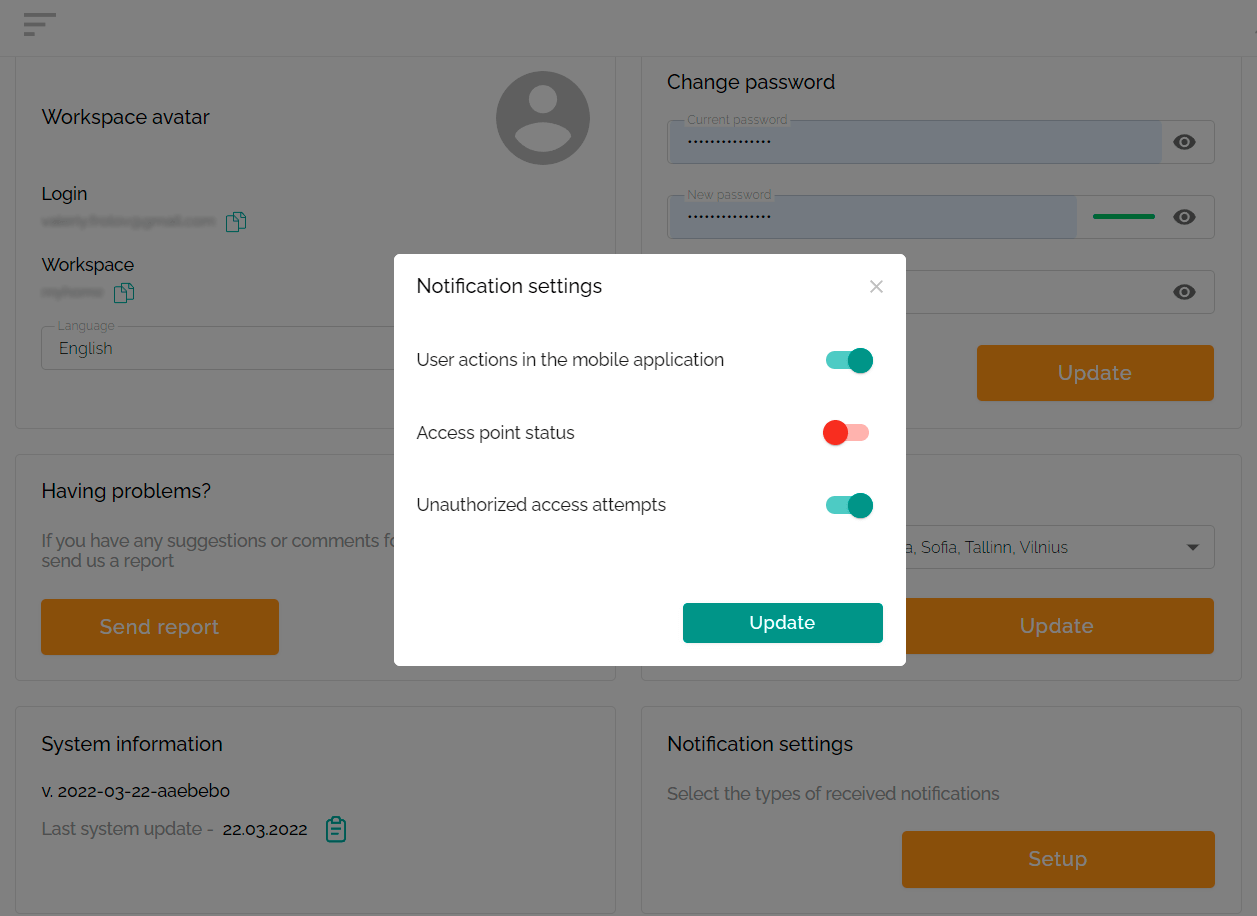
- Notification settings – specify which instant notifications you would like to receive.
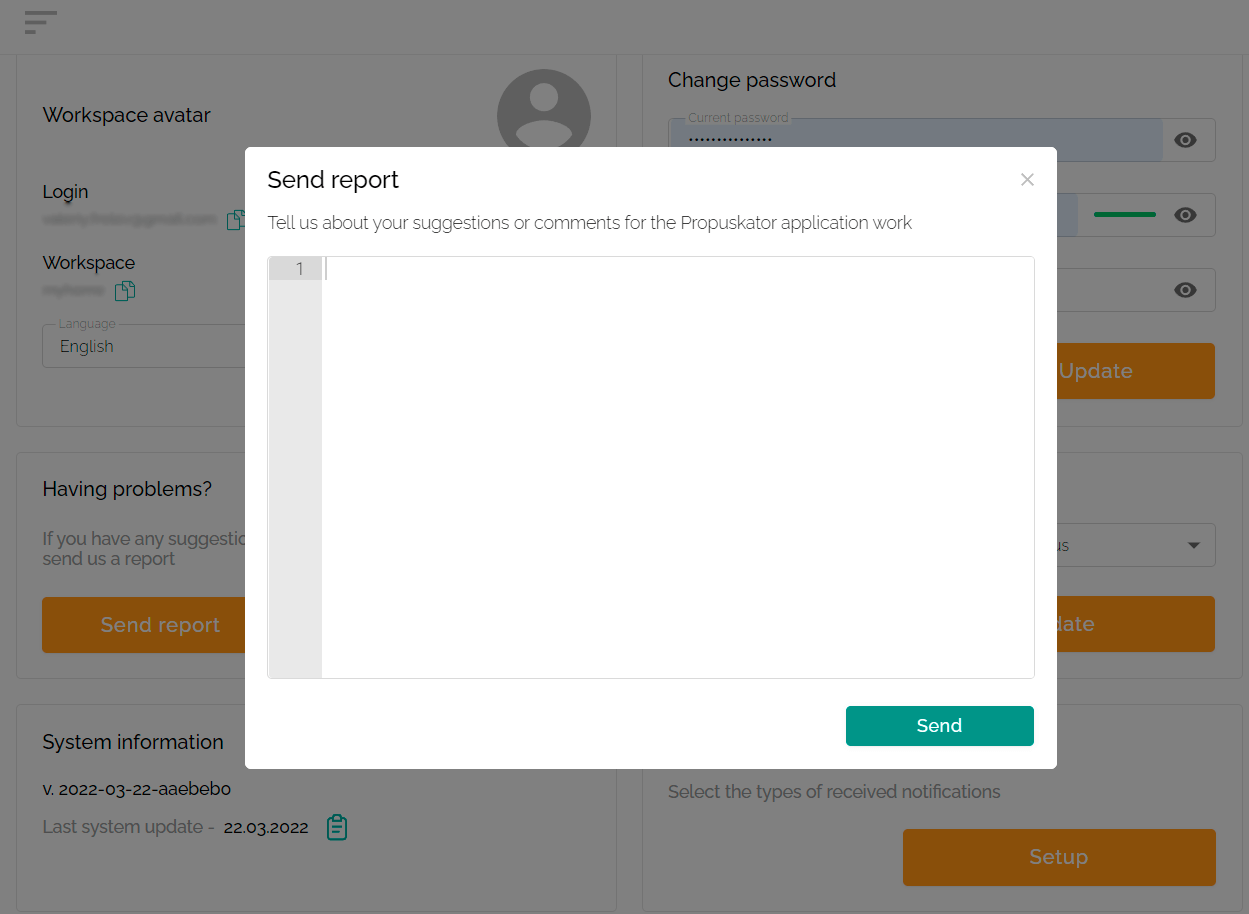
- Reporting Problems – if something doesn’t work, seems awkward, or you’ve got an idea for additional functionality, feel free to let us know by clicking the “Send report” button!